


It’s a fortnight to Christmas. Still wondering how to decorate your Christmas tree? Well, I have got your back. Here are 5 Christmas tree decoration ideas that not only look stunning and feel warm but make heads turn. From difficulty level 1 to difficulty level 5- 5 being highest- these ideas will make sure that your tree is absolutely resplendent: take it from me when I say so because I am the self proclaimed Christmas queen. Haha, that is a joke. Please don’t take it seriously.
Ok, so lets start with difficulty level 1 shall we?
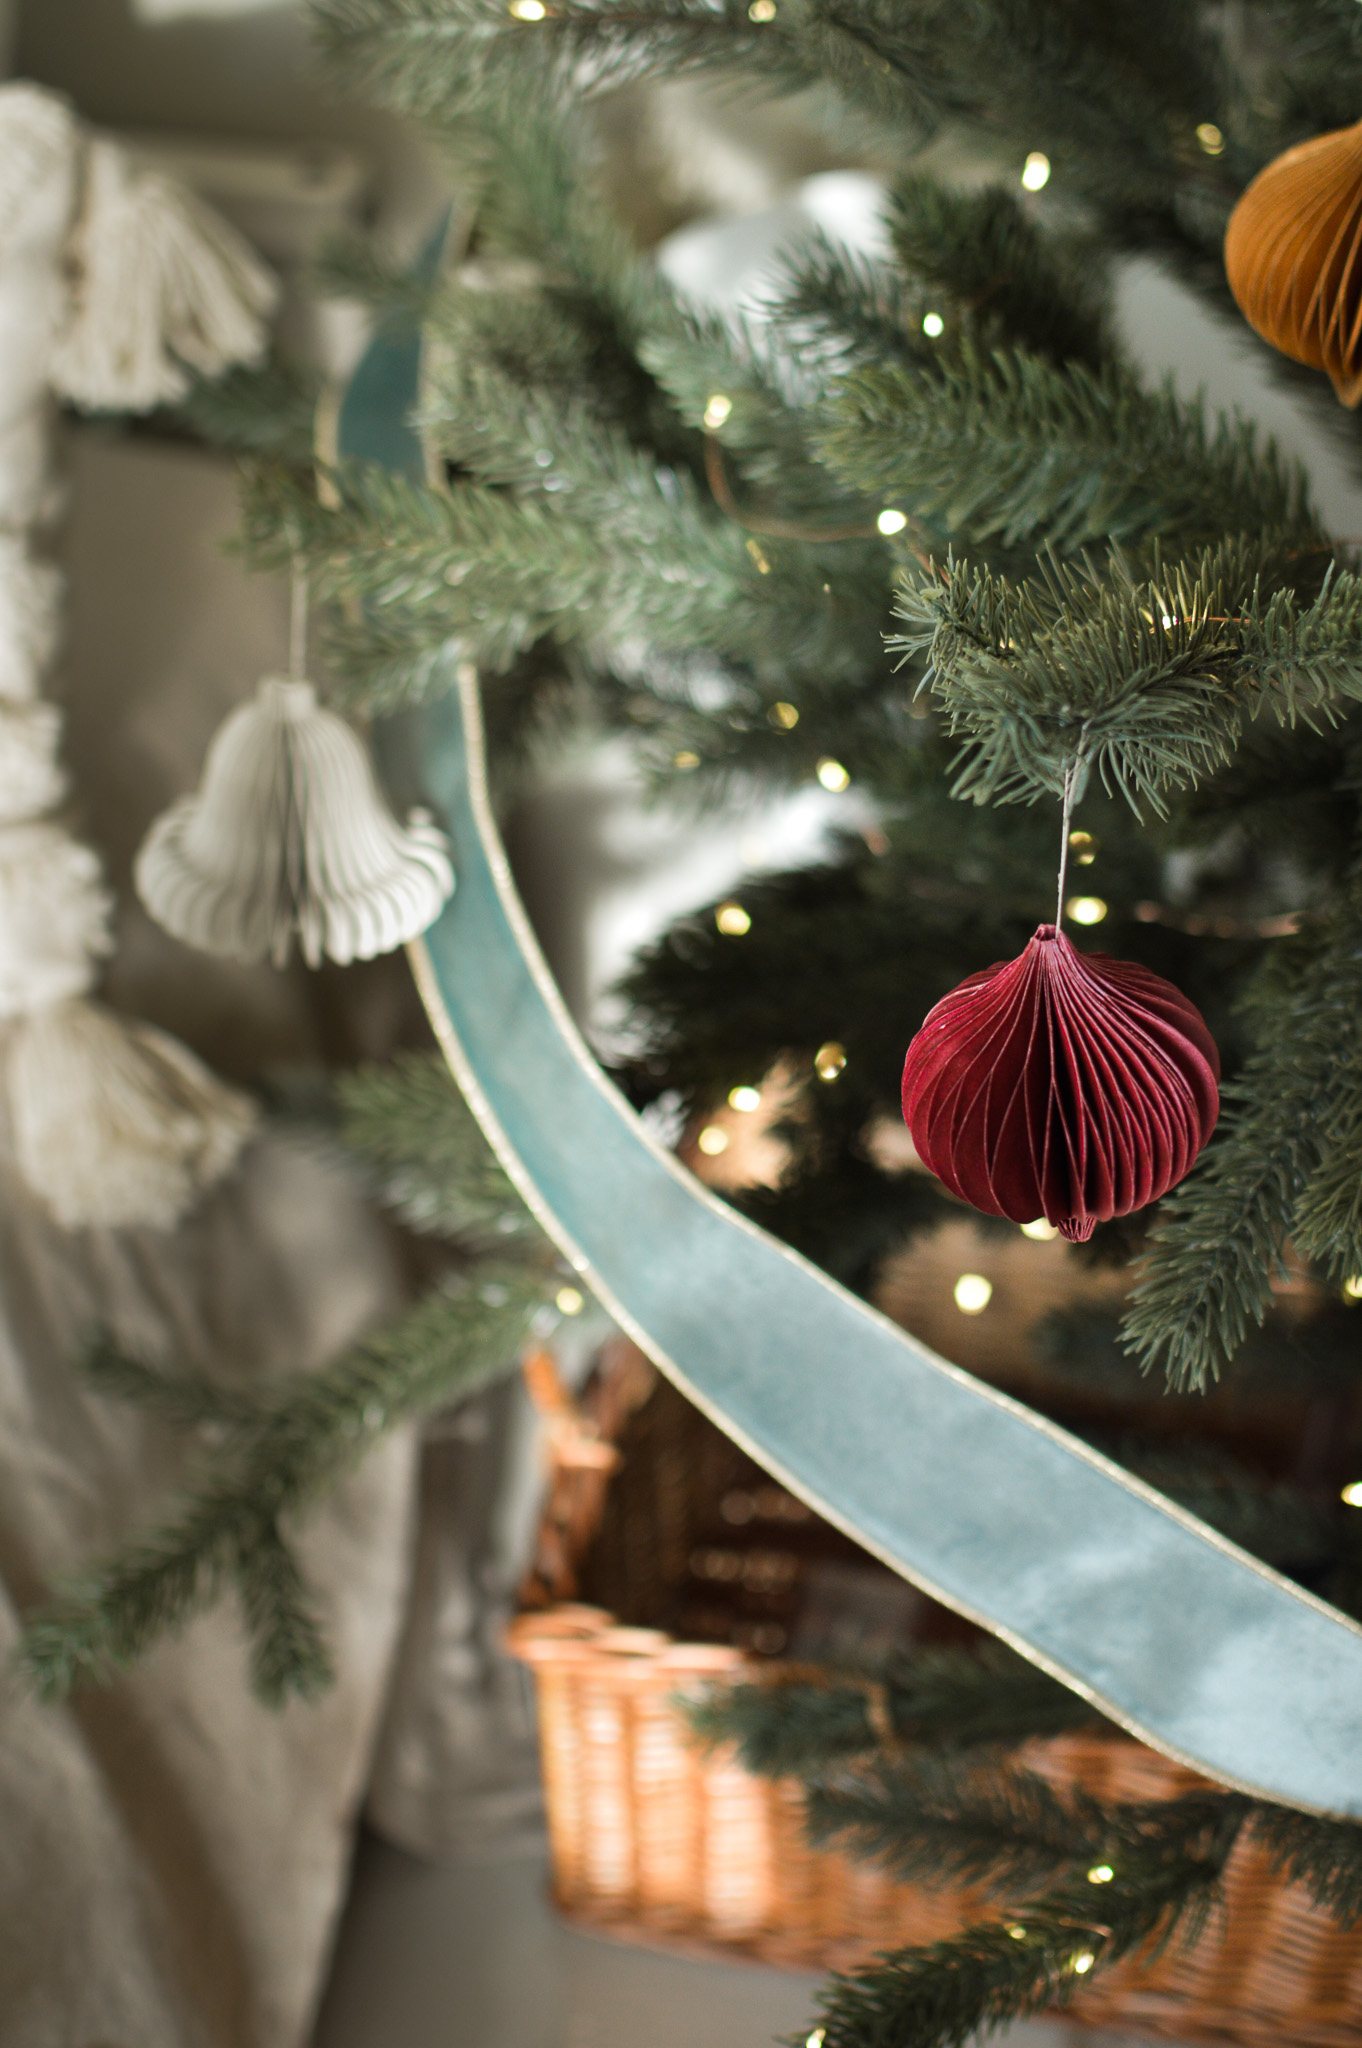
Level 1: A Scandi-Minimal tree for the impatient ones
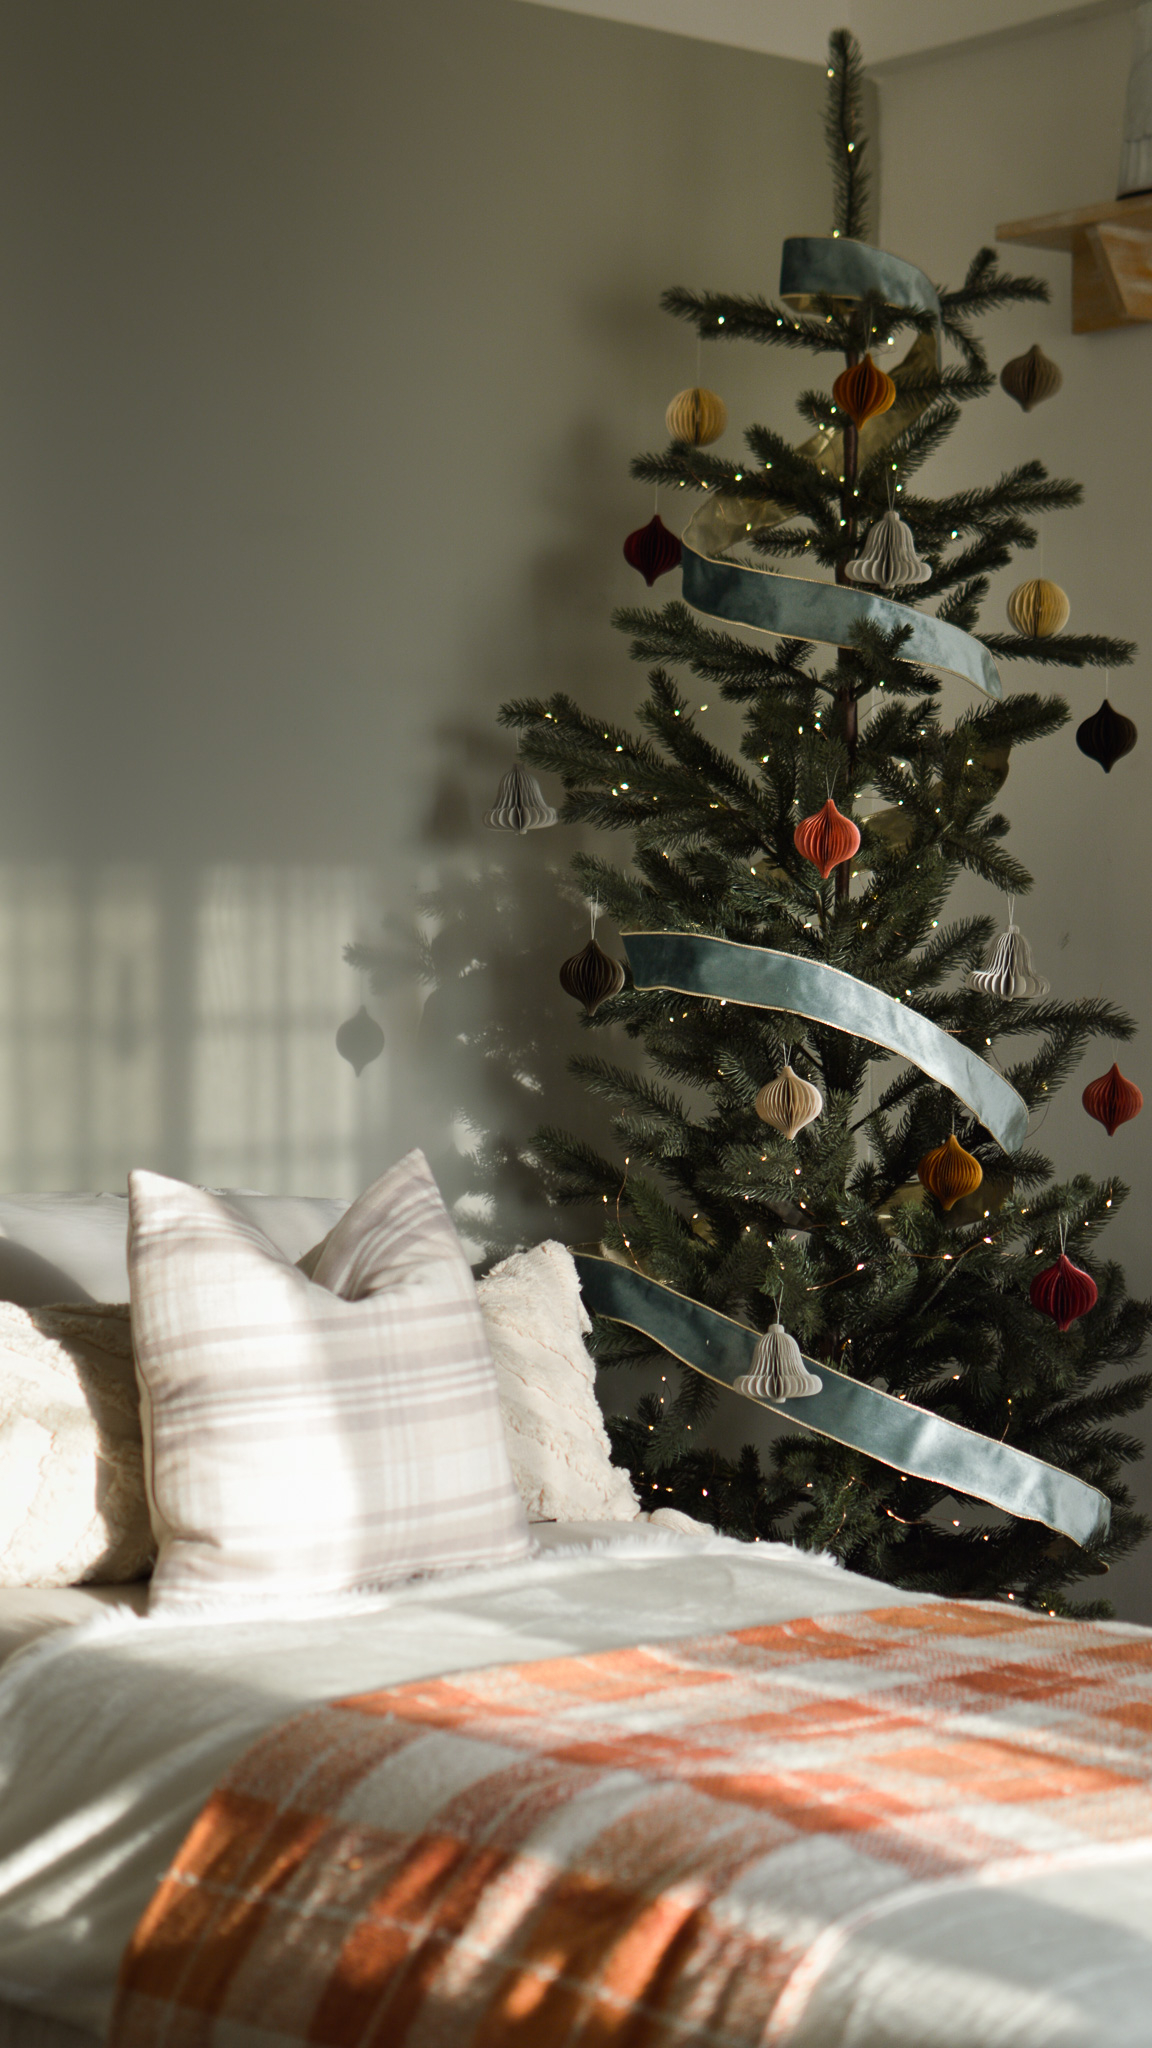
It’s ok if you are impatient and don’t really find the mojo to decorate your Christmas tree for hours. This tree decor can be done under an hour and with a good glass of vino it’ll be a breeze. Or coffee. But hey, choose your drink with care.
What do you need: paper ornaments, a thick velvet wired ribbon, Led copper wire lights, a basket/collar/skirt for the base.
How to do it: First, place your tree inside a tree collar or skirt. Next take your led lights and string it around the branches. See this video if you are unsure how to do it correctly. Once this is done, add your paper ornaments. I recommend these because they are light, won’t fall and break if you place them incorrectly, adds a very Scandinavian vibe to trees that are not heavily decorated. You are saving your a** but you are also doing a minimal tree that looks beautiful, so you are good :’) Lastly, wrap the velvet ribbon circling the tree. Start at the top and end at bottom. Tuck the corners.
Level 2: A Rustic, farmhouse minimal tree for the semi patient ones
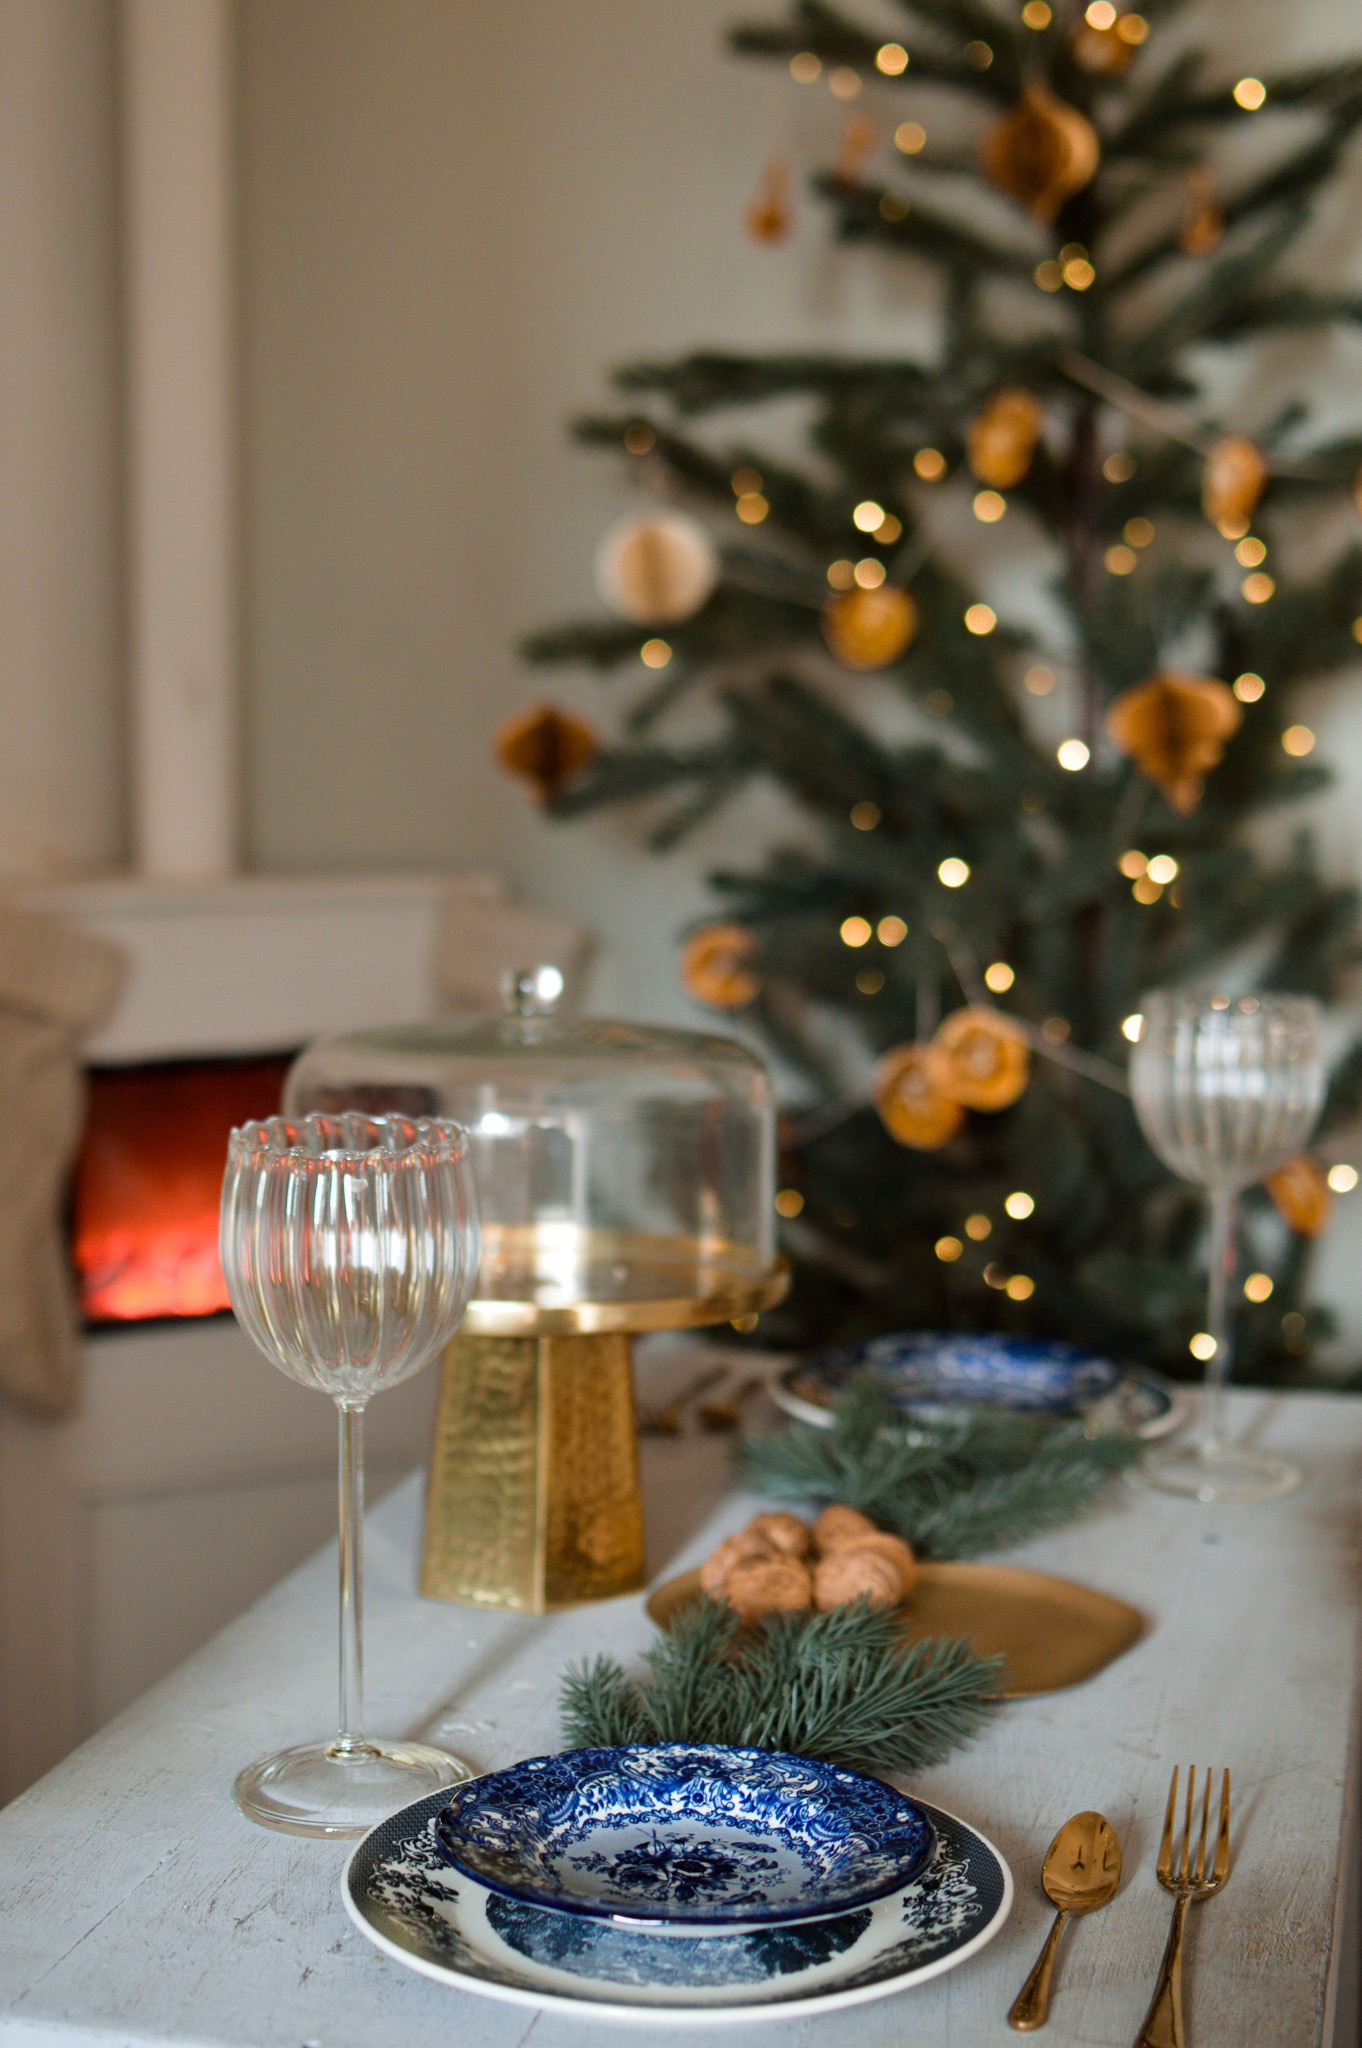
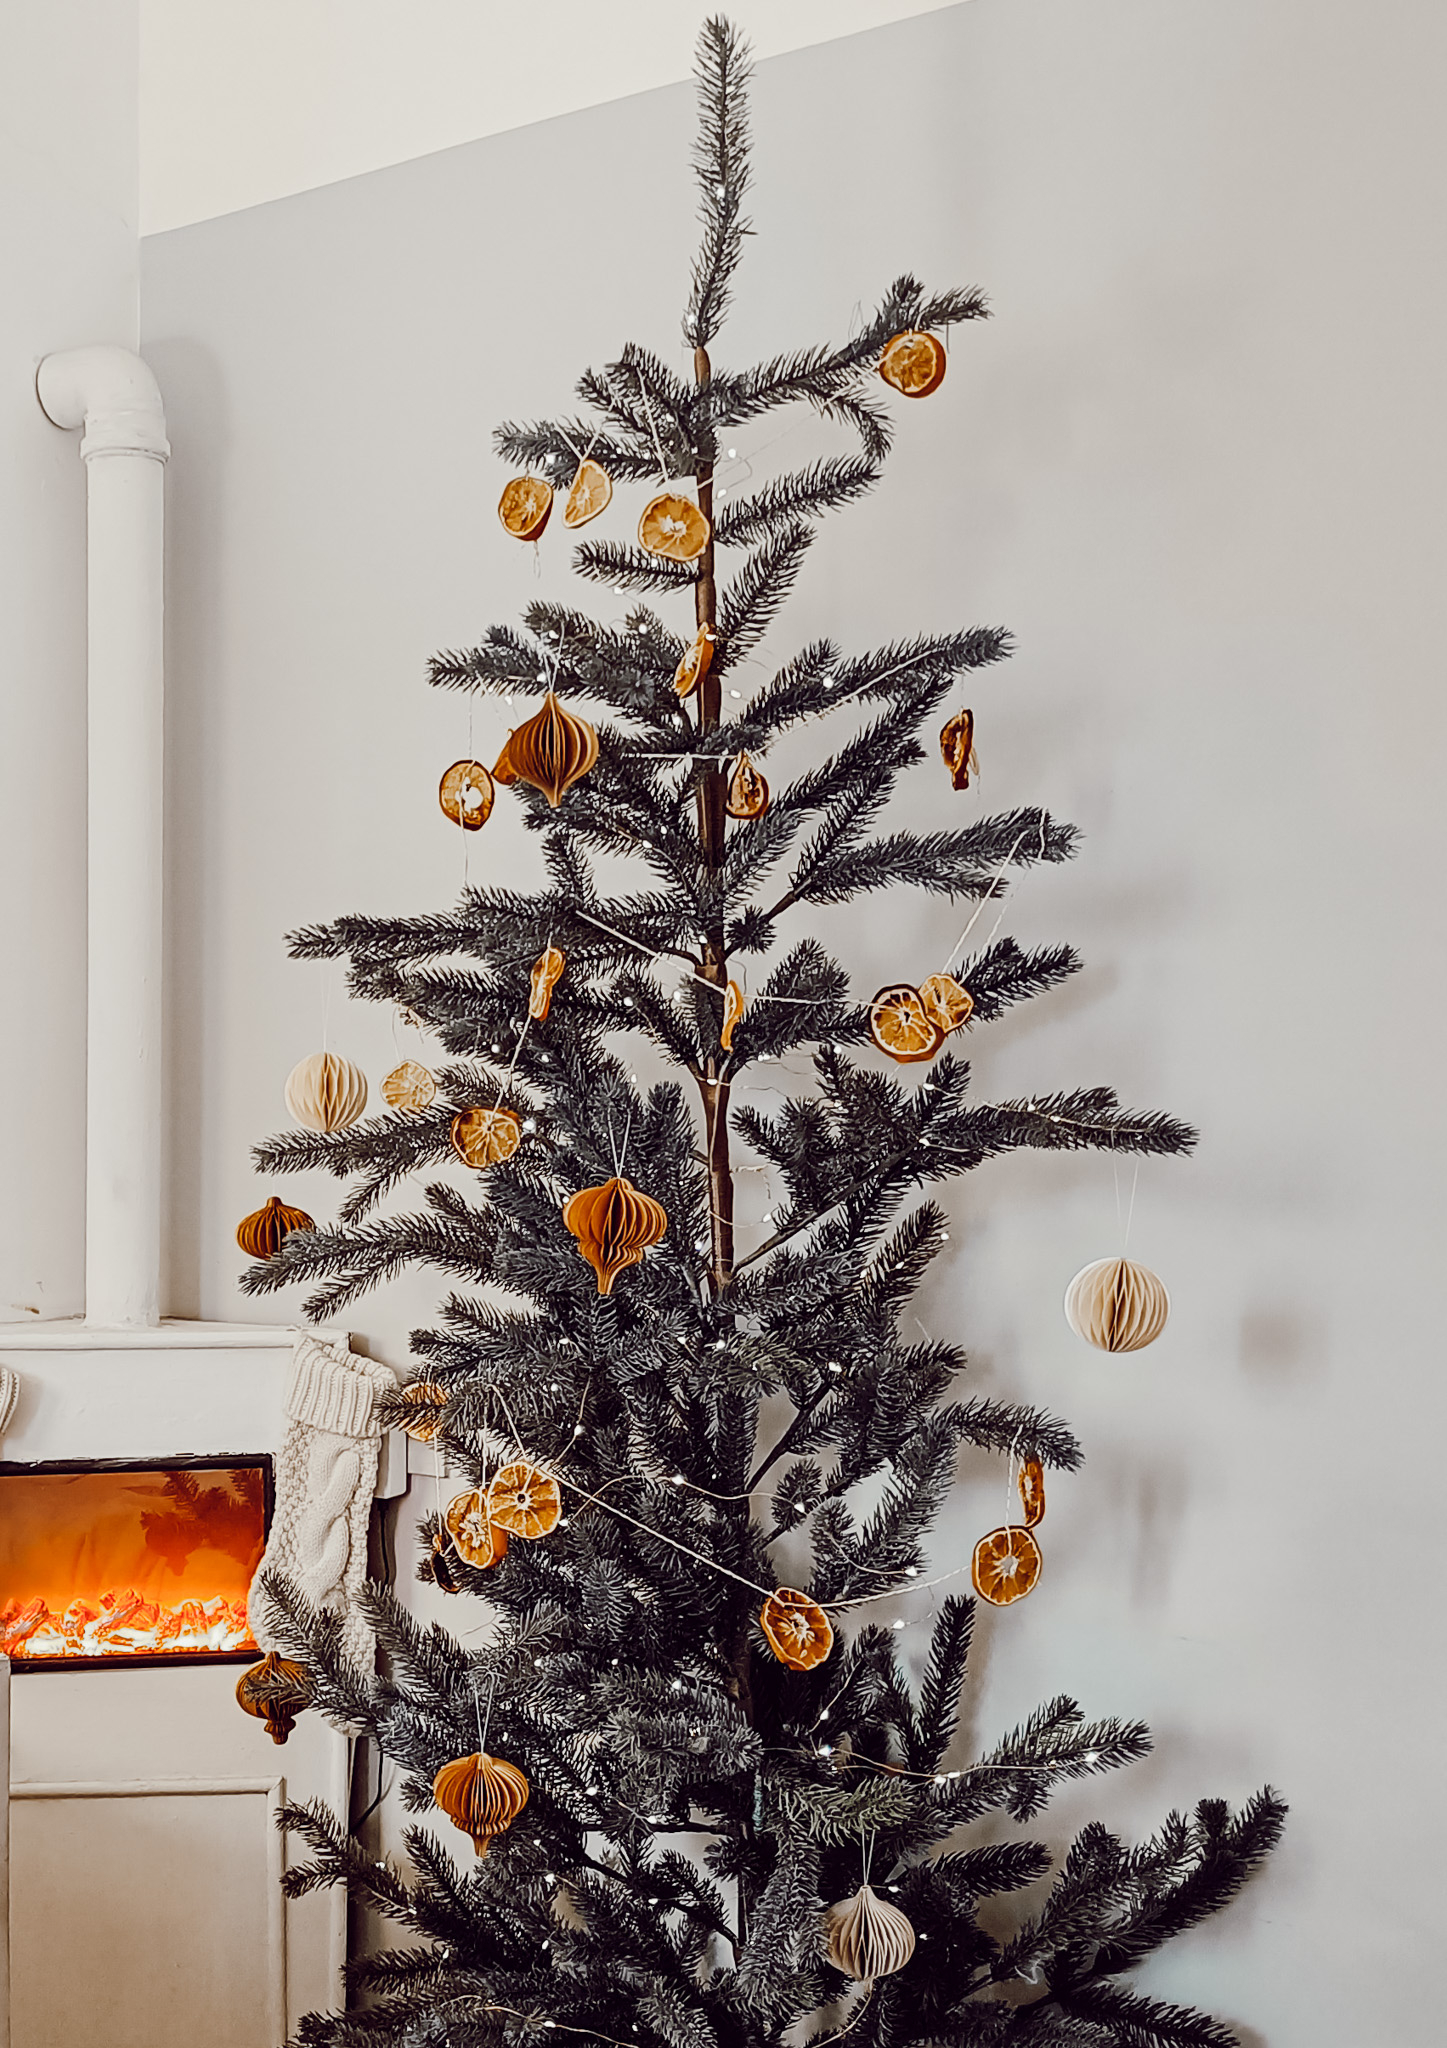
Honestly, this classifies as level 2 simply because of the process of drying oranges. Barring that, this is truly level 0. There is a little patience involved in this tree decor but you really don’t have to stand there as the oranges bake. Just keep an eye on the oven, is all. Here’s how to bake orange ornaments
What do you need: paper ornaments, dried orange slices strung into a garland, Led copper wire lights, a basket/collar/skirt for the base.
How to do it: First, cut and bake the oranges. Then string it into a garland. Next, add your tree inside a collar or add skirt to your tree and light the tree. Next, string your orange garland- just start from the top of the tree and run the garland through the length of your tree. next, add the paper ornaments! Tada. Done.
Level 3: A traditional, vintage inspired tree for the ones who recently crossed the ‘details is everything’ bridge.
Firstly, welcome to the other side. It’s really good in over here. It is a constant battle with a crooked ornament or a fallen chain but hey, what’s life without a little challenge eh?
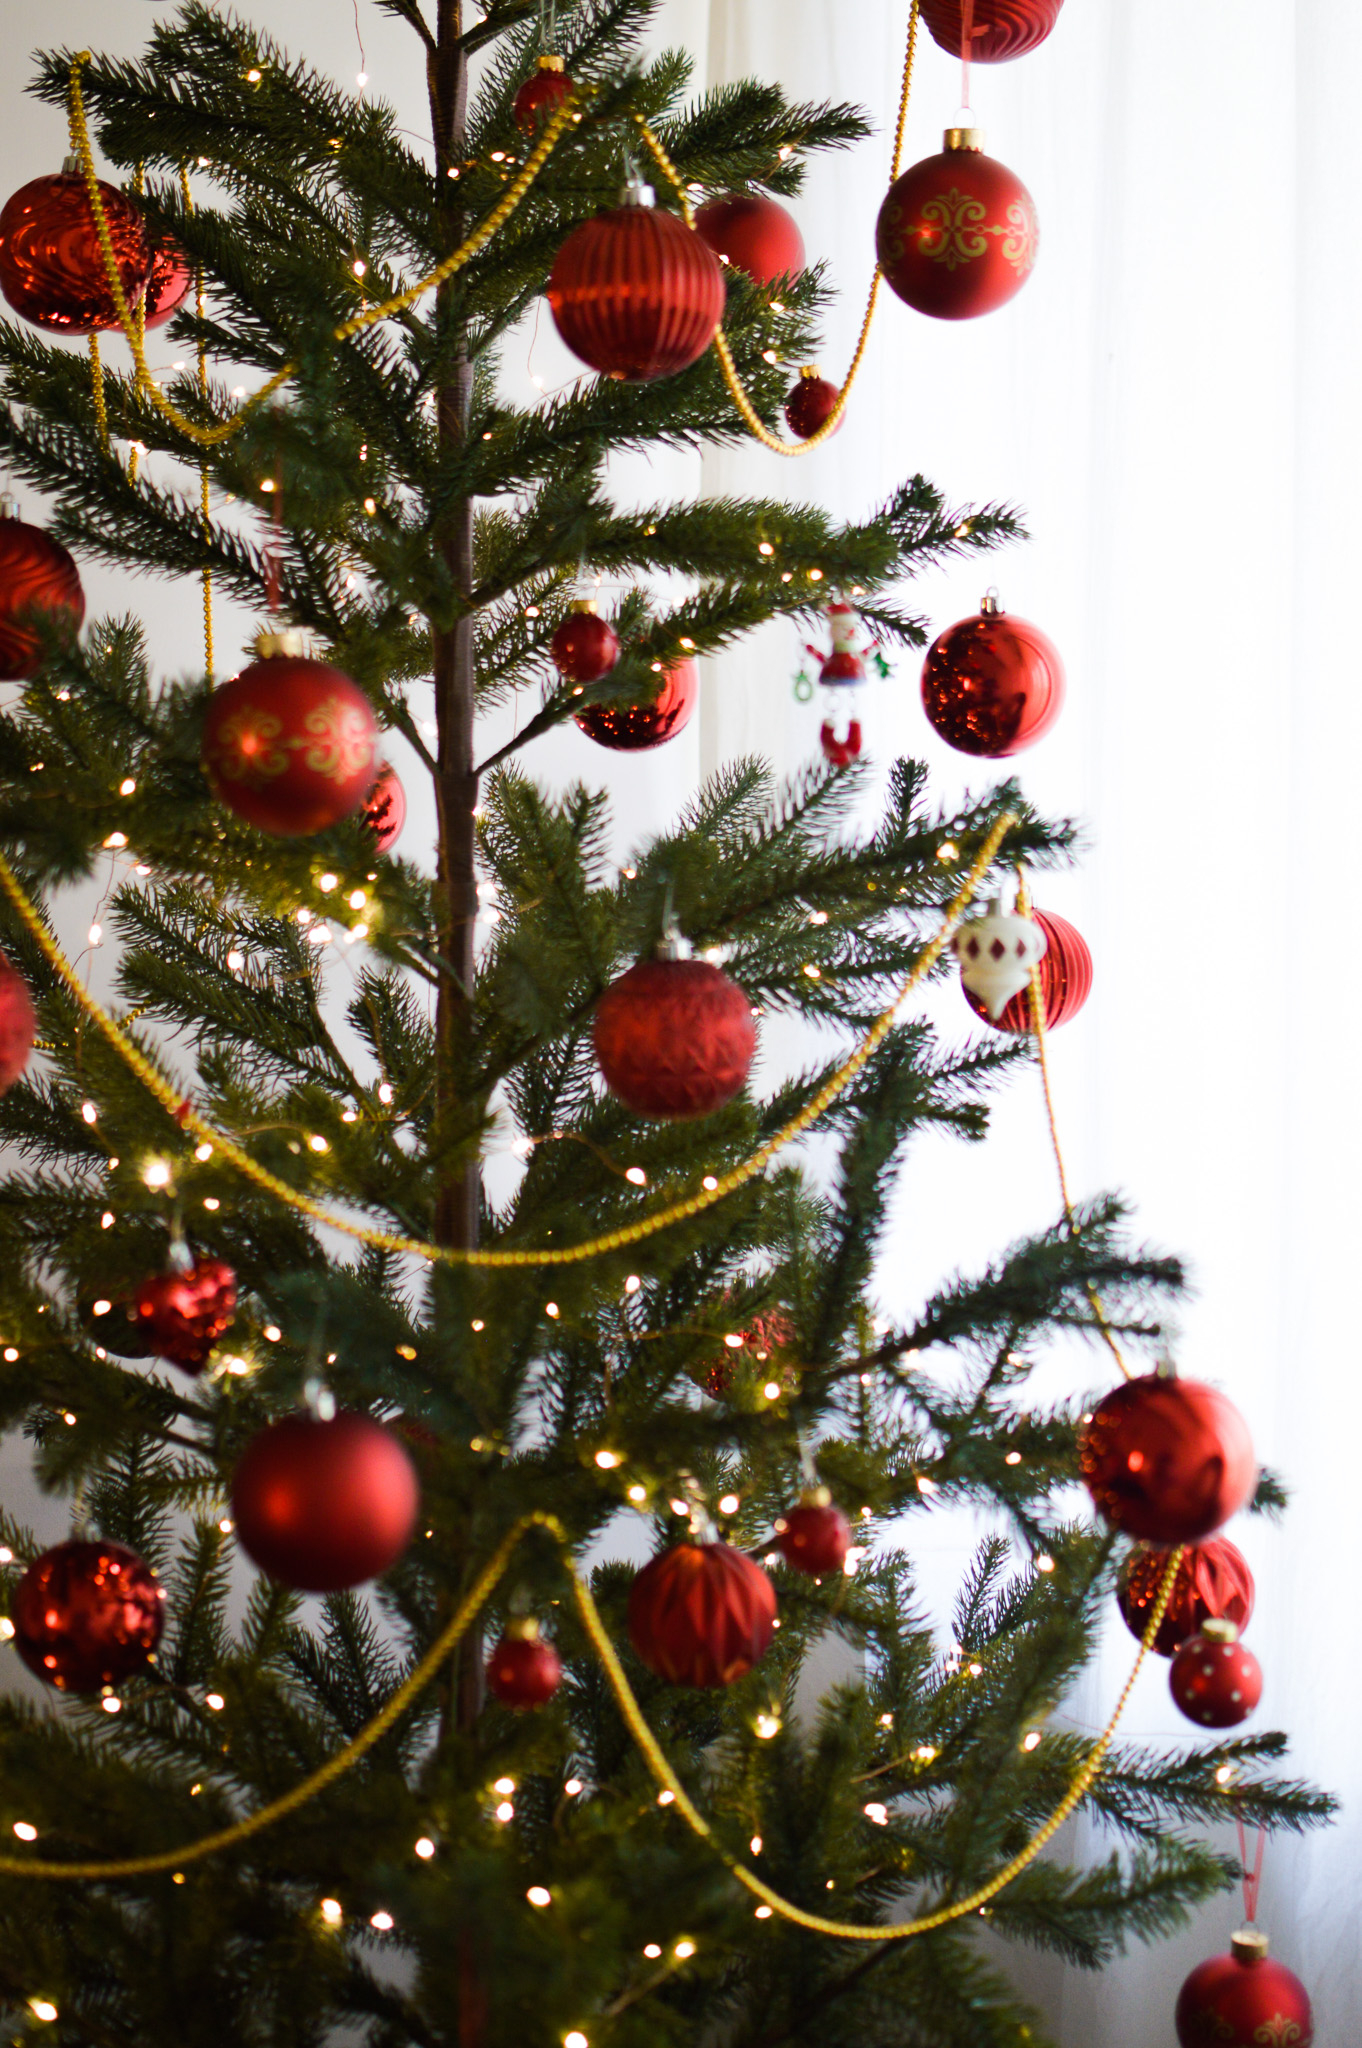
What do you need: Large and medium glass/plastic red ornaments in 2 finishes- glossy and matte, gold beaded garlands- 20 meter, Led copper wire lights, a basket/collar/skirt for the base.
How to do it: Firstly, put your tree inside a collar or a basket and light it up. This is level 3 so take time to meticulously light your tree. Next, start adding the ornaments. Start with one kind, add it throughout the tree, then start with the next kind. This way you will never have two ornaments of the same kind side by side. You will also be able to gauge where the gaps are. Add all large first and the fill the gaps with medium ones. Again, don’t be lazy. Start with one kind of medium ornaments and then move on to the next kind. Once done, add your beaded garland in scalloped fashion.
Note: If you have garland sizes cut for each section, that’s great. If not, start from the top branches and finish near the base of the tree running the jump sections (the length of garland that jumps from one layer of the tree to another, say from 2 to 3) from behind the tree.
Level 4: A Vintage ribbon tree for the ones with patience of a mantis
Needless mentioning it looks absolutely STUNNING. Like drop dead gorgeous stunning. Anything that requires a lot of effort actually shows through and that is the reward in itself.
What do you need: ornaments of your choice, Non-wired satin and cotton ribbon, Led copper wire lights, a basket/collar/skirt for the base.
How to do it: Follow instruction from “Level 3” above with regards to the tree collar, ornaments and light. Next, tie bows to your tree. Like ornaments, start with one kind, fill the tree and then move on to the next color/material.
Pro-Tip: Do not left the ends hanging. Very gently, create ripples and tuck them slightly on the side of the ornament. Look how I have done where the pink car is hanging.
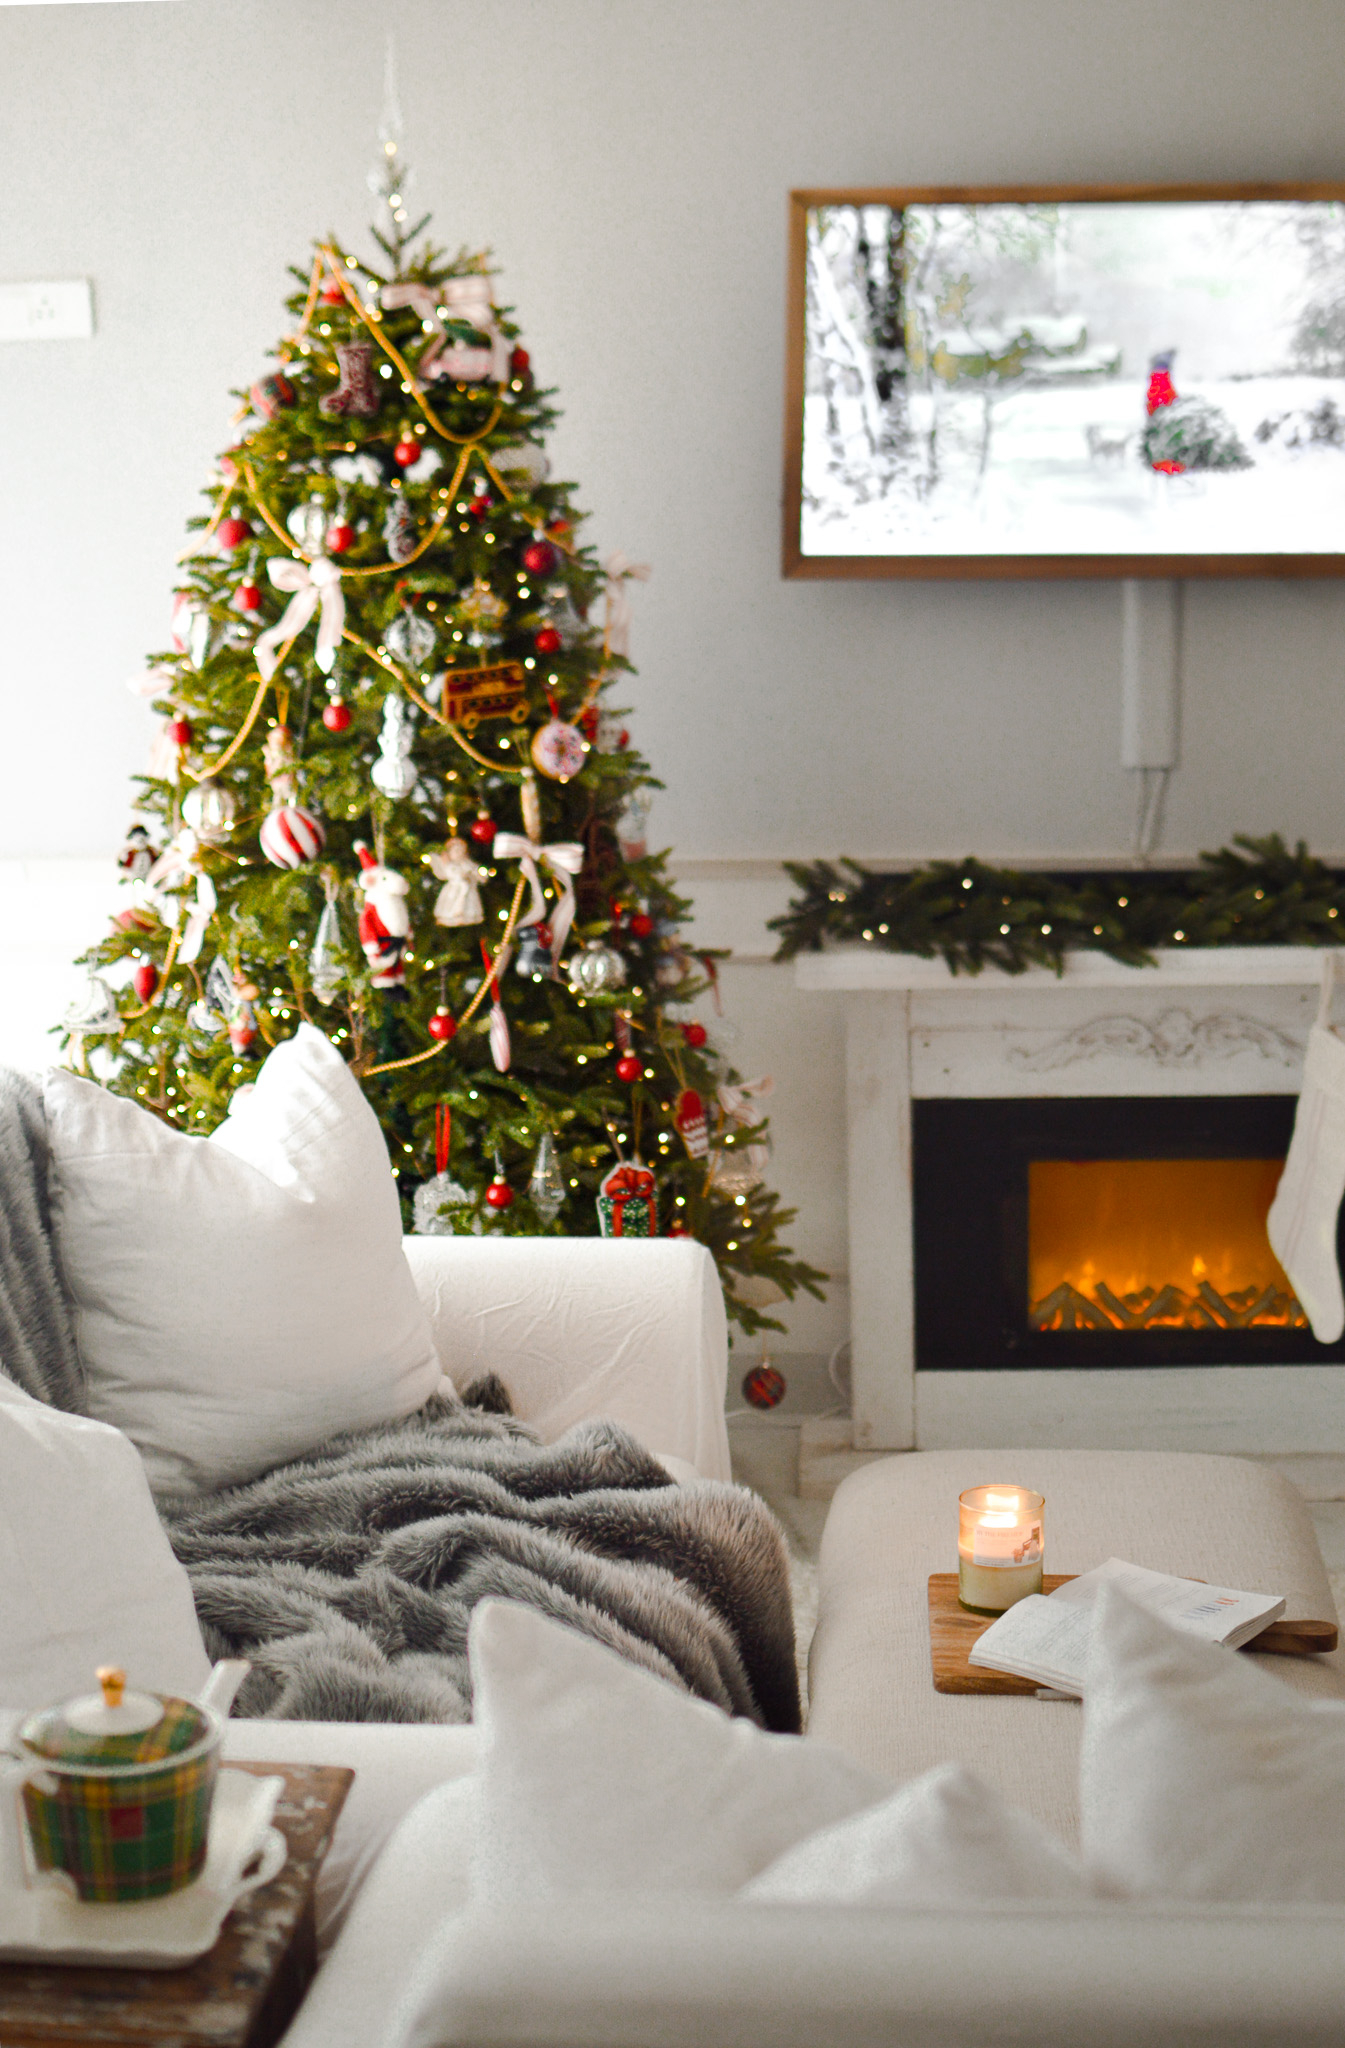
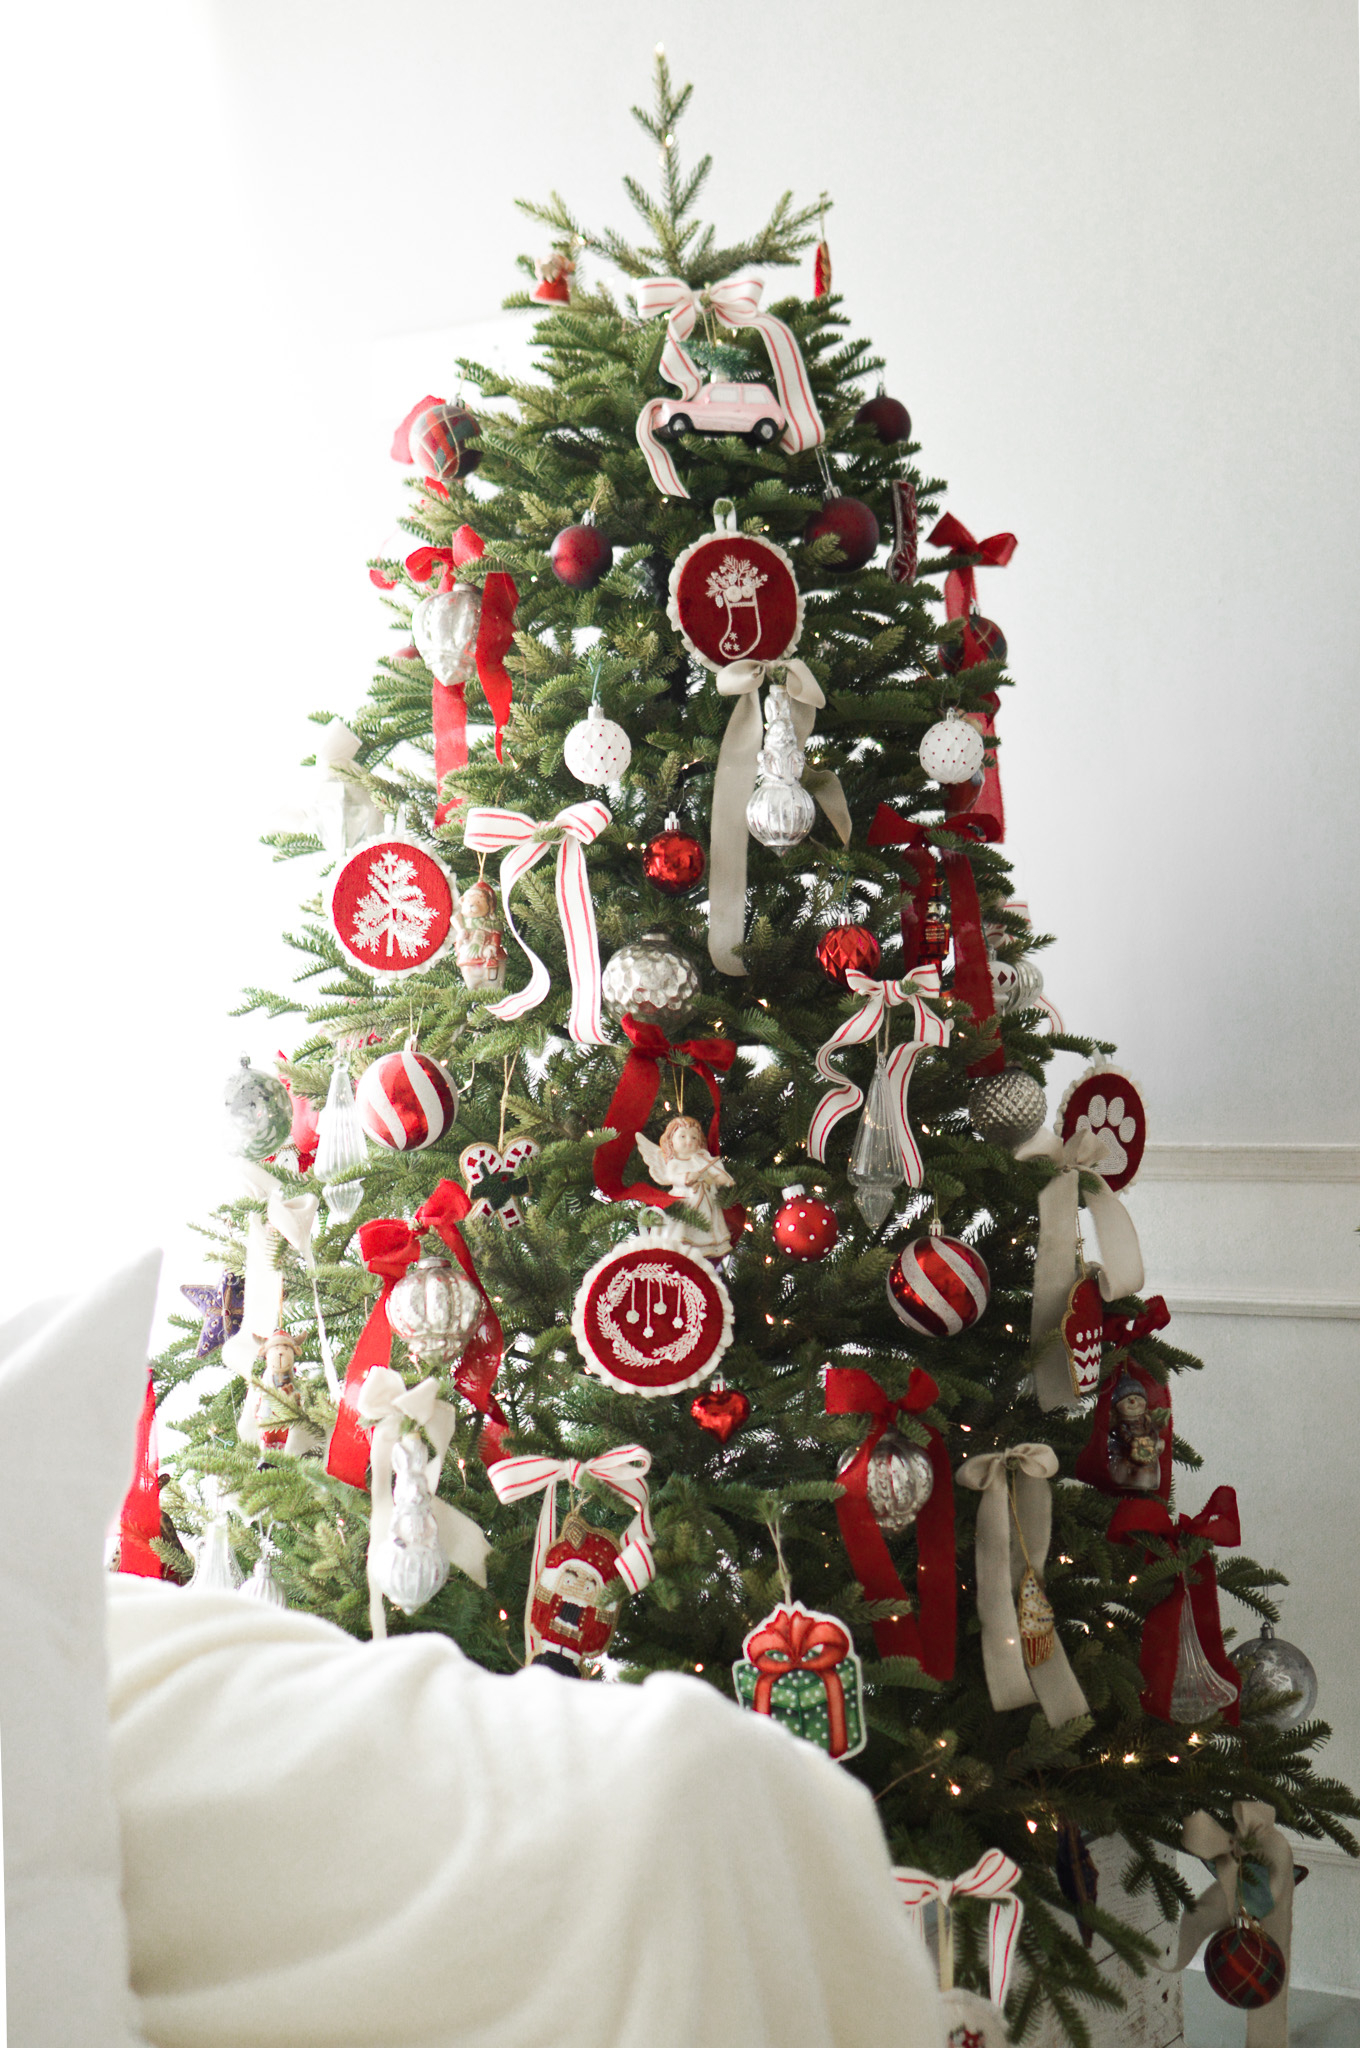
Level 5: A Victorian inspired tree that might take you 2 days but the result is brilliant

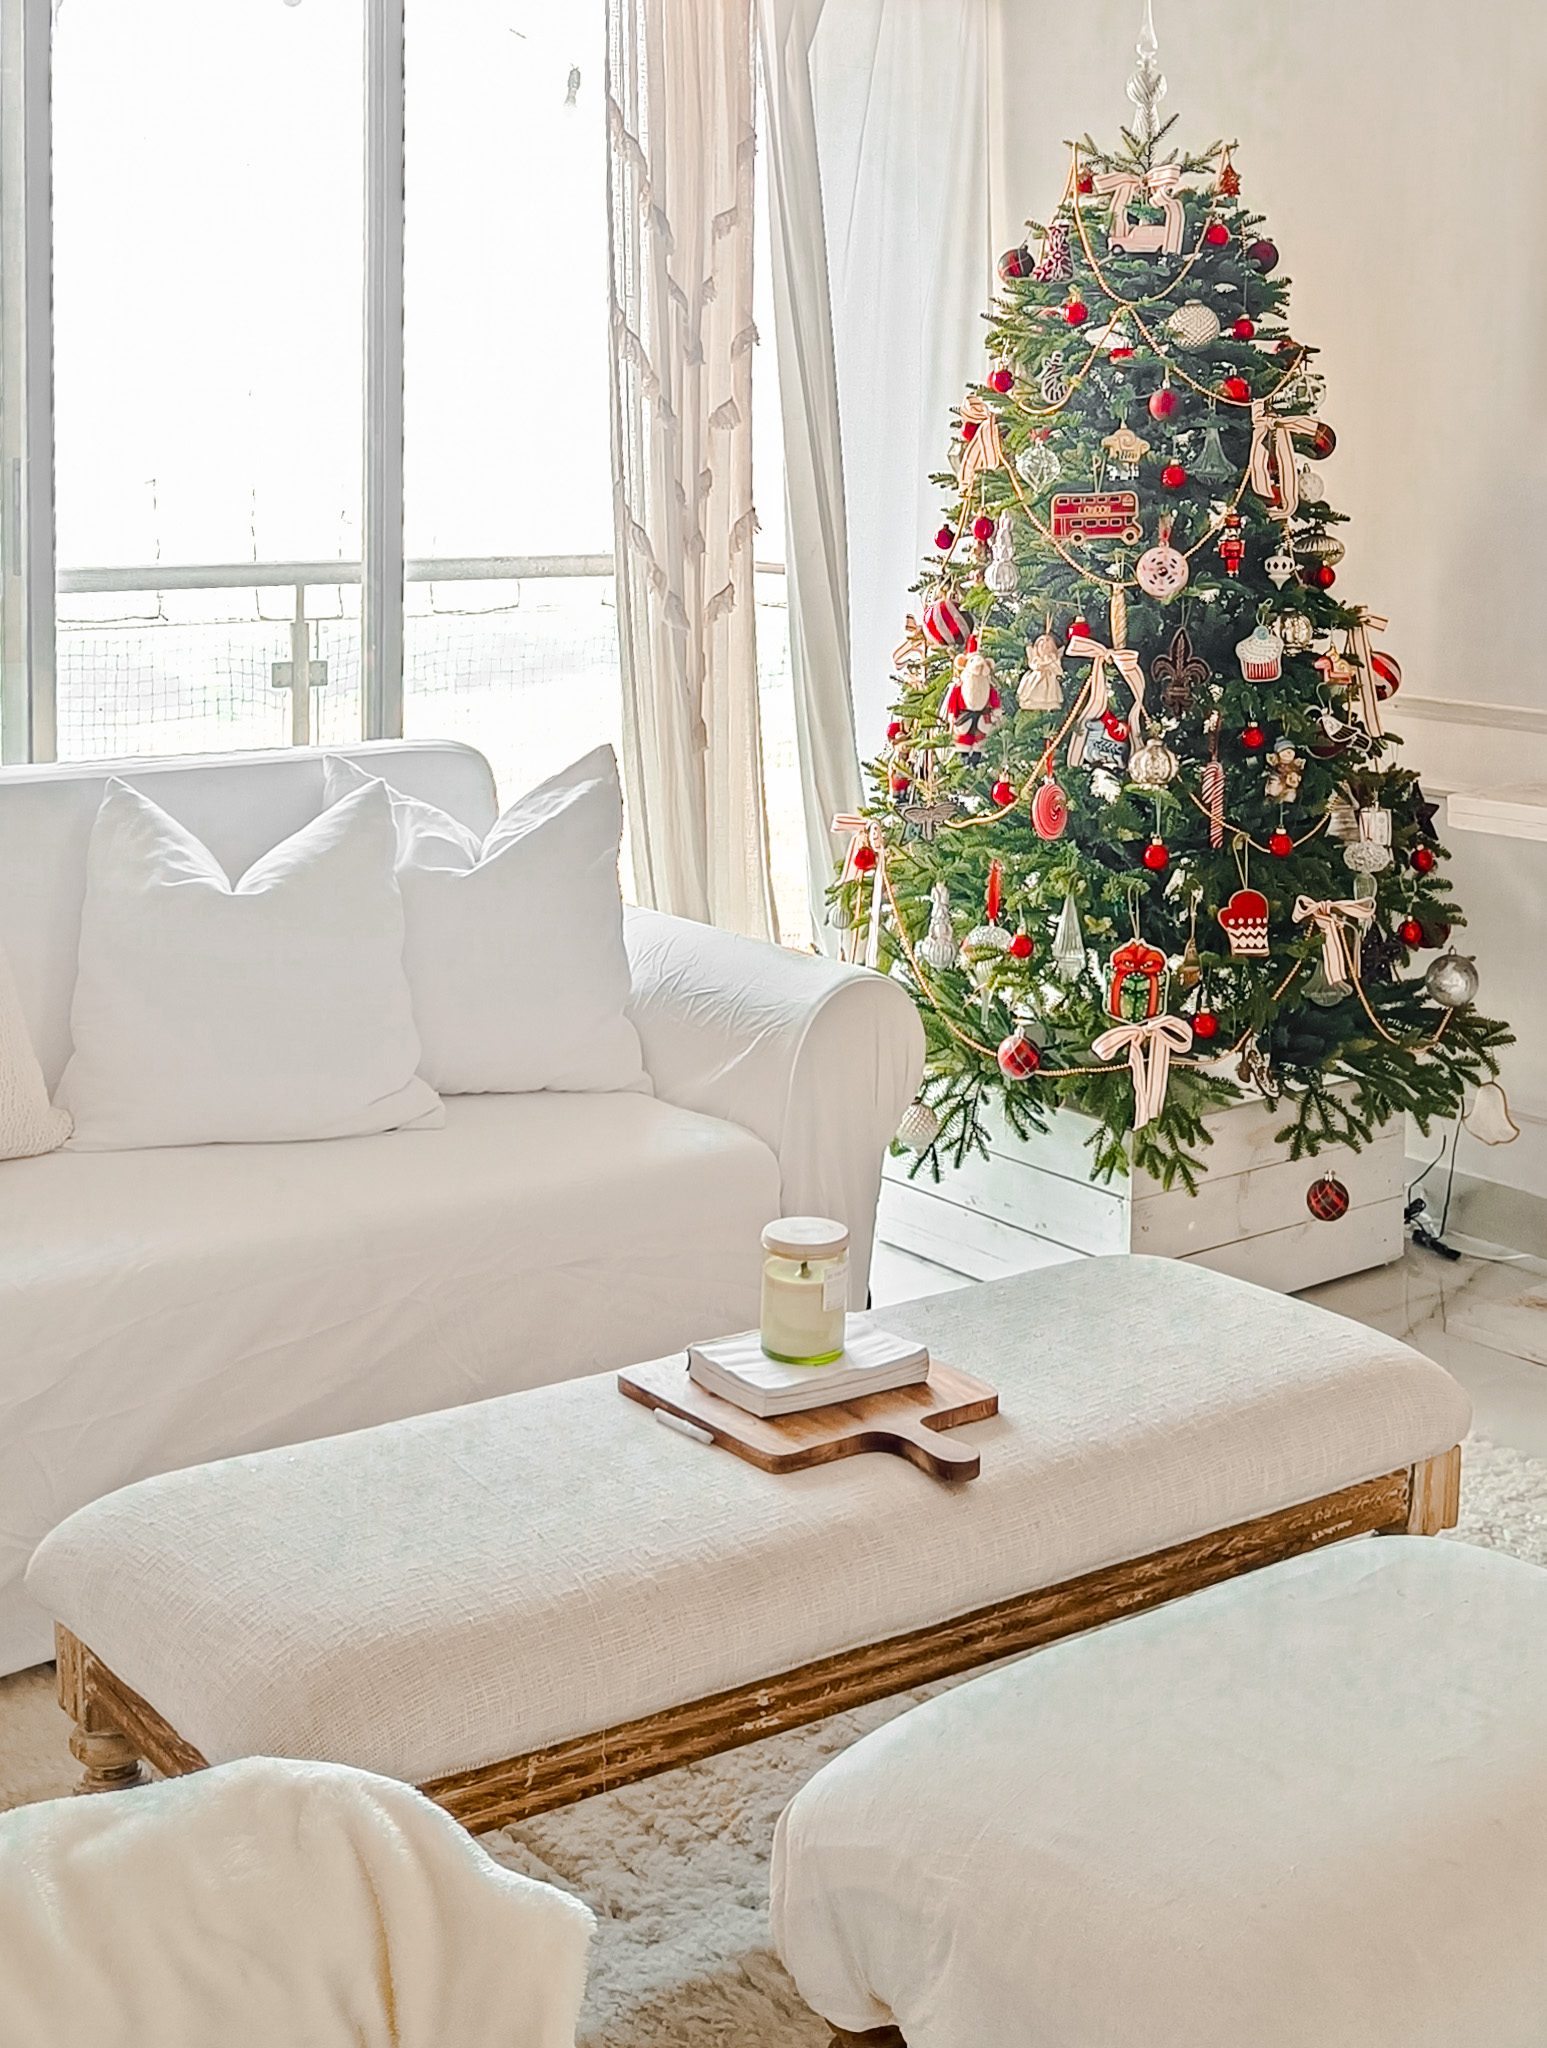
But if i am completely honest, this took me a good 4 days because there is so much going on. I know a very few people will get to this line, so if you are here, I see you and I appreciate you. You have the patience level of master Shifu and eye for only the best. Come, come, sit here with me 🙂
What do you need: Large and medium glass and ceramic ornaments, vintage ornaments and collectibles, golden beaded chain, ribbons, Led copper wire lights, a basket/collar/skirt for the base and a spire for the top branch.
How to do it: Start with the regular steps- add the tree inside a collar, light the branches and add ornaments. Now the ornaments part is very crucial here. You want the best, collectible ornaments to shine upfront but you don’t want the tree to have weight only in the front. So make sure you distribute the weight equally on your tree. Fill almost every branch with some ornament or the other. This is crucial for a victorian style tree that often portrayed abundance back in the days. Use a mix of glass, ceramic, glitter, matte, large and small ornaments. You can see here for the ornaments in our tree.
Next, add garlands to your tree in scalloped fashion but not in concentric circles. Add one layer. The next layer add in a fashion so the scallop of one is beneath the inverted V formed by the garland above.
Add ribbons to where the garlands rest on the branches.
Add your tree topper- Star or spire. I love spire because it adds a lot of height!

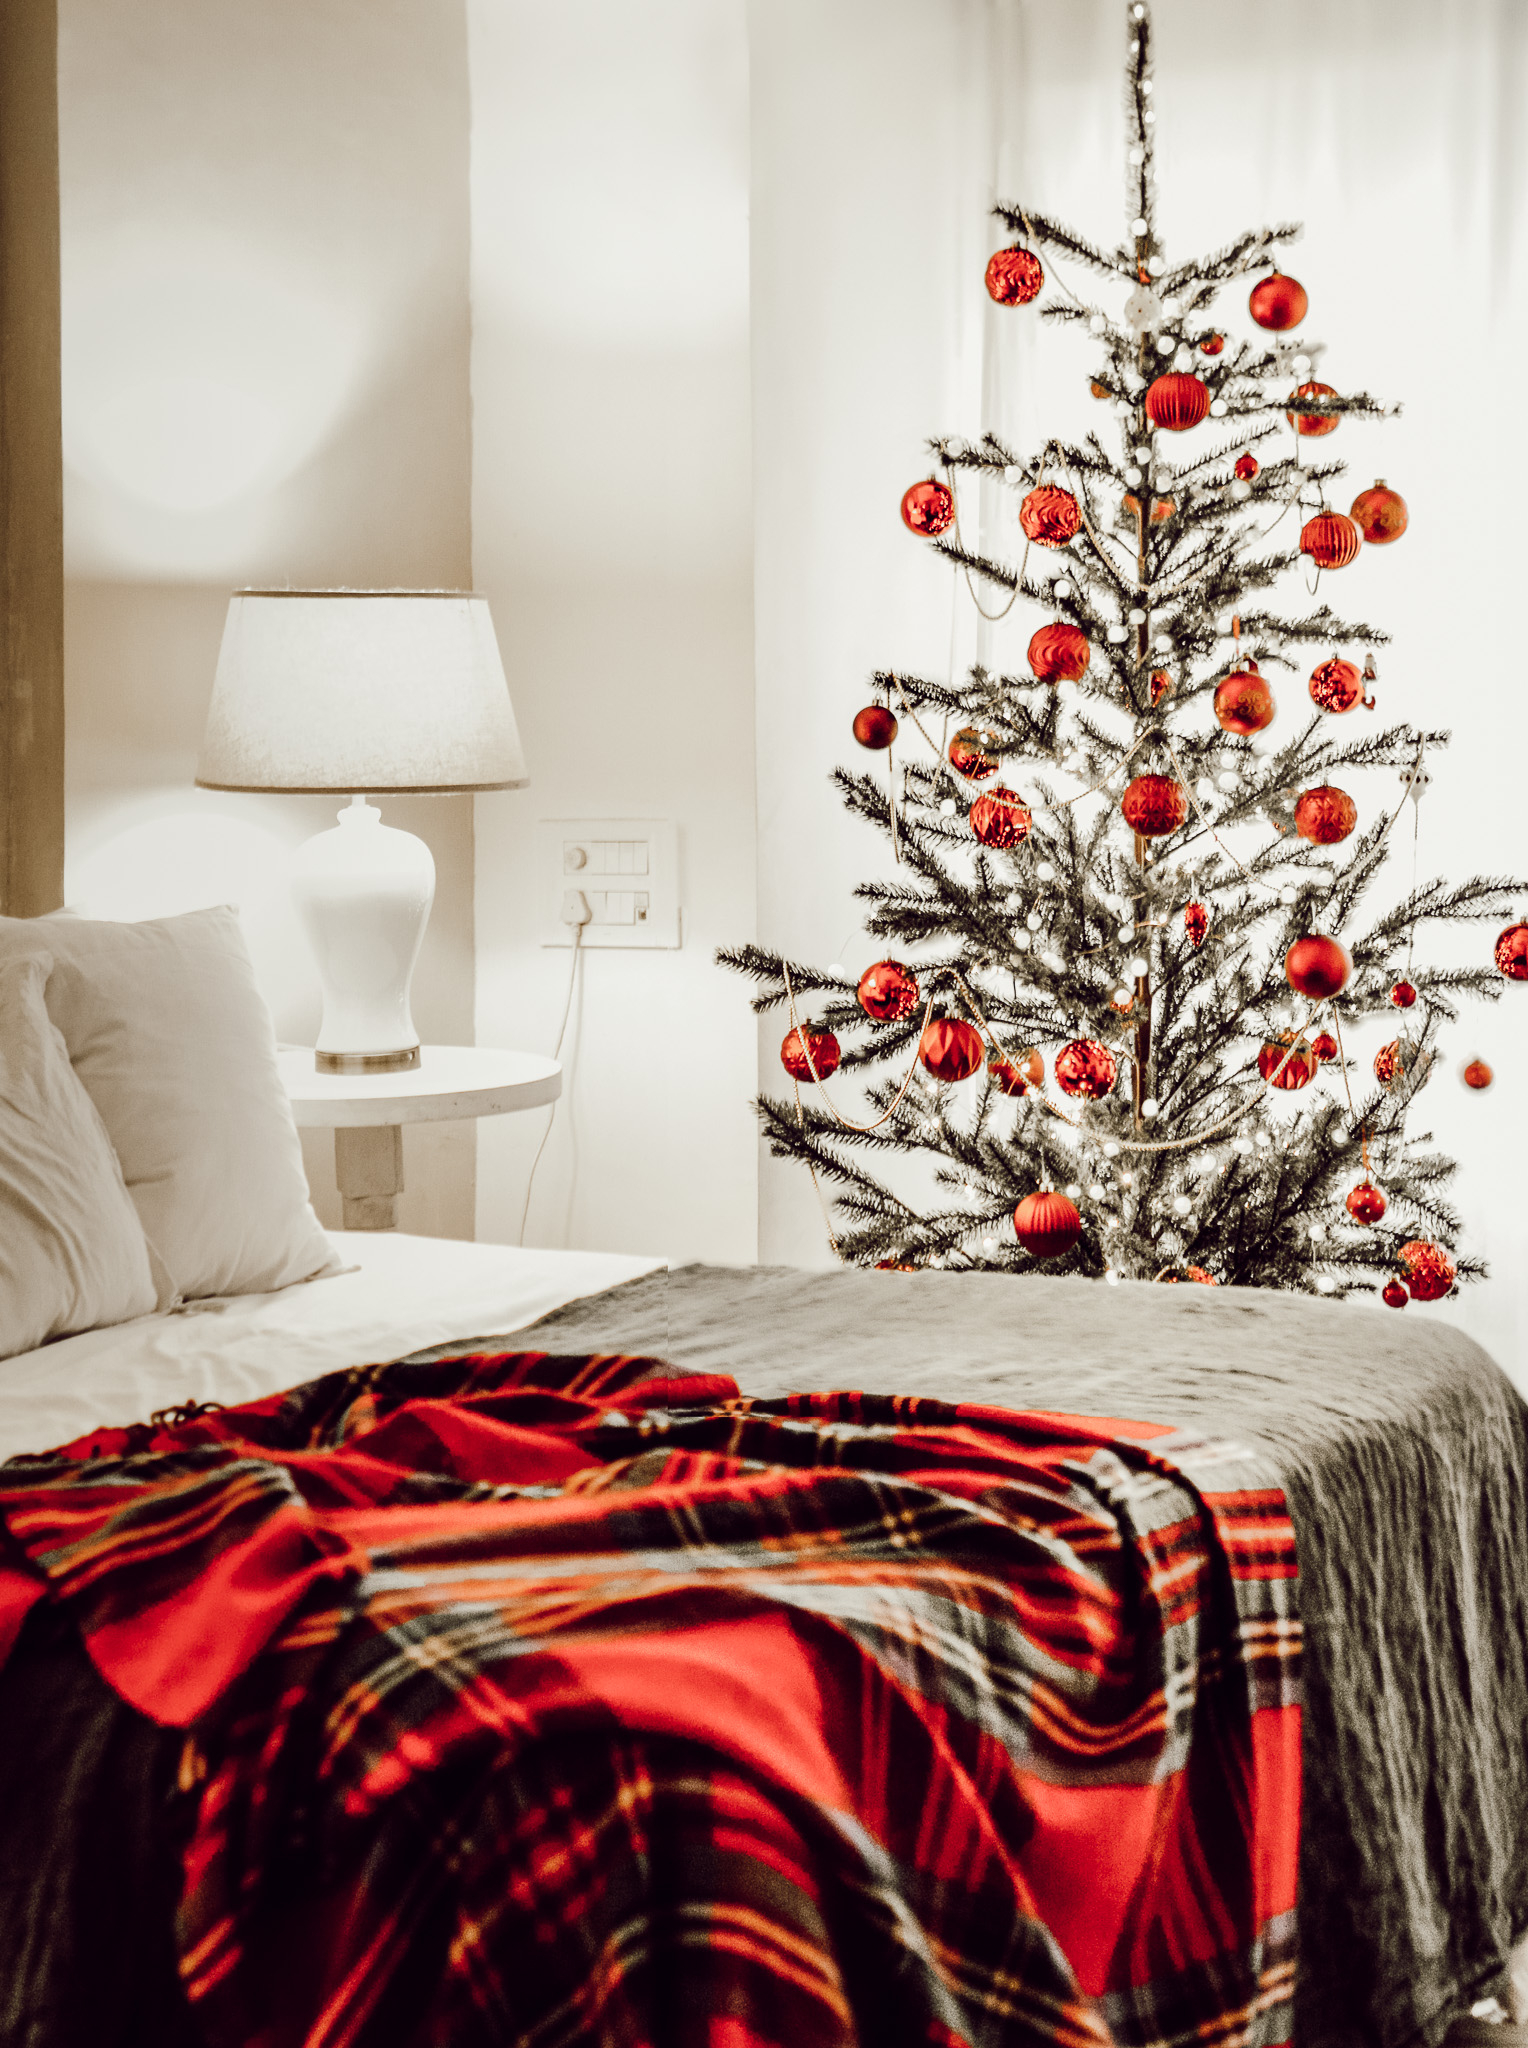
Btw, if you have a beautiful fresh tree or a very bushy tree, you can also leave it as is. Naked trees with just lights on also look very, very beautiful. This is level 0 but the look and feel of it is 100!
Love
Rukmini