Focus stacking is a digital image processing technique through which you can stack multiple photos of different focal lengths and combine them into one photograph so as to achieve a better depth of field. When you are photographing a subject with a very shallow DOF (depth of field) – vignettes, macro photos and more- focus stacking can come especially handy though it’s used in landscape photography too.
Basically, when you shoot a subject up close, the focal plane isn’t wide enough to capture the entire image sharp. So you shoot multiple images of the photo shifting the focus each time so you could combine the two.

See the above image for example. What looks like one image replete with its artistic merits (haha) is actually a combination of two images.
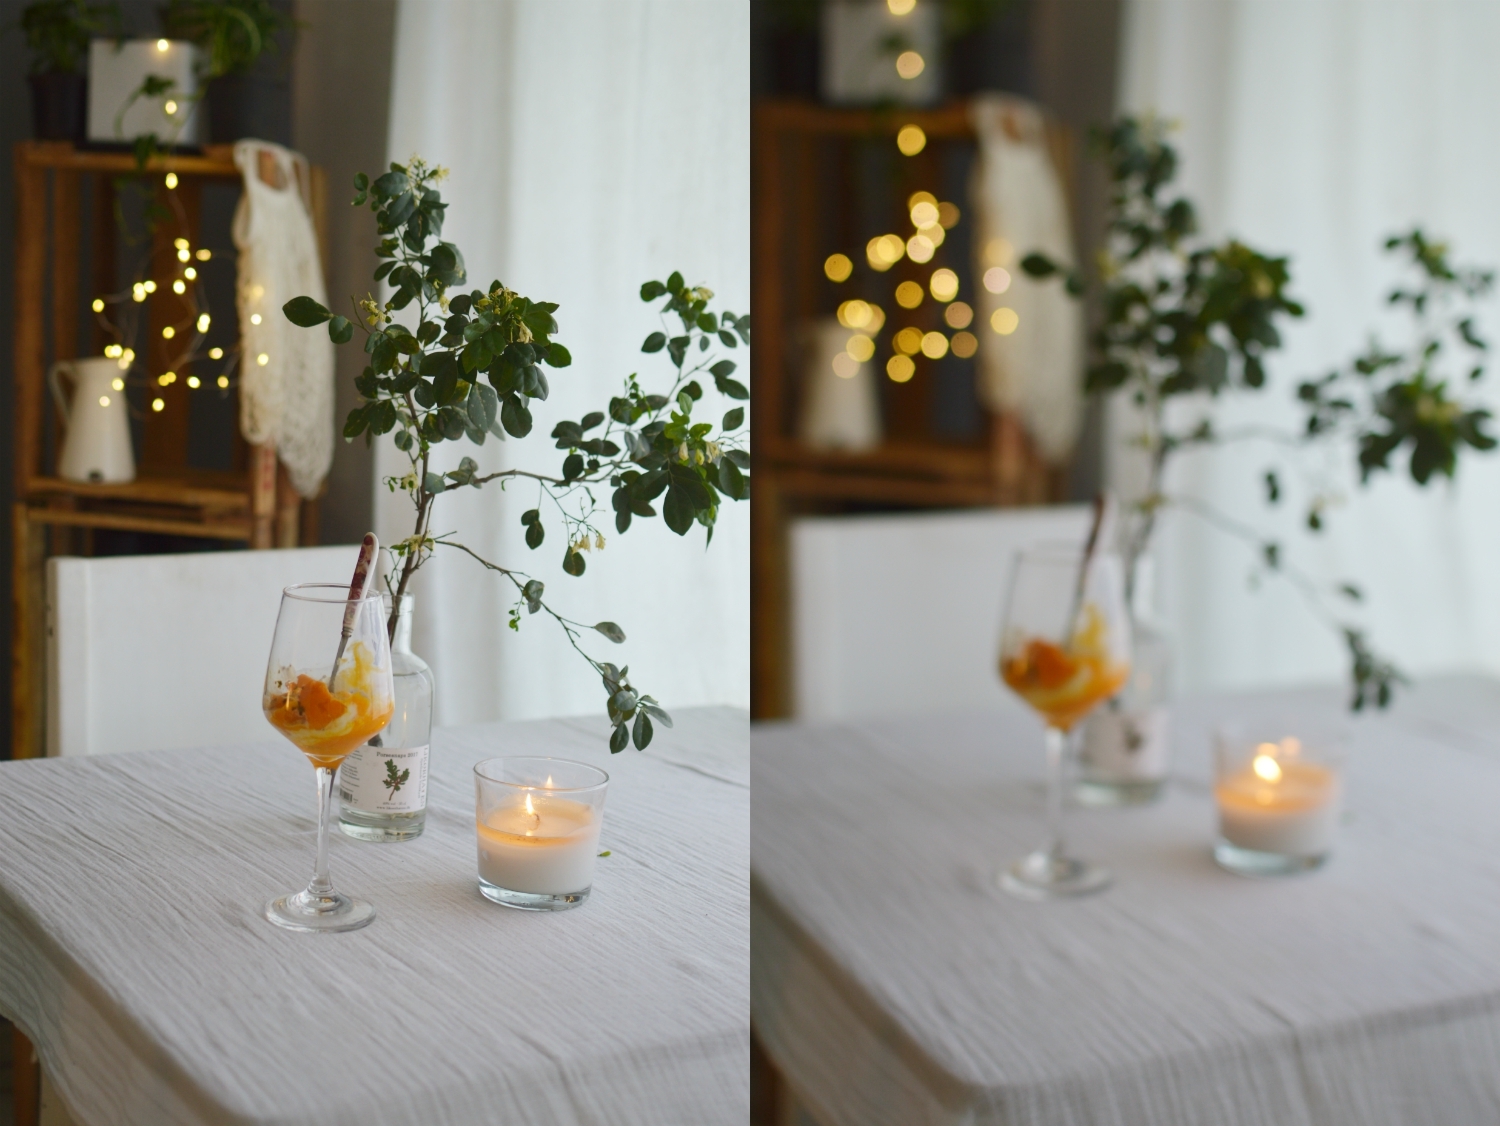
I have kept the bokeh from the second and the sharpness of the glass from the first. Thing is, when you shoot close up, the focal plane isn’t wide enough to capture the entire image as sharp. So shoot multiple images of the same subject with different focal distances and then process it in photoshop.
Steps to focus stacking in Photoshop
First up, open your images in photoshop, click the little lock next to each icon to unlock the layers.
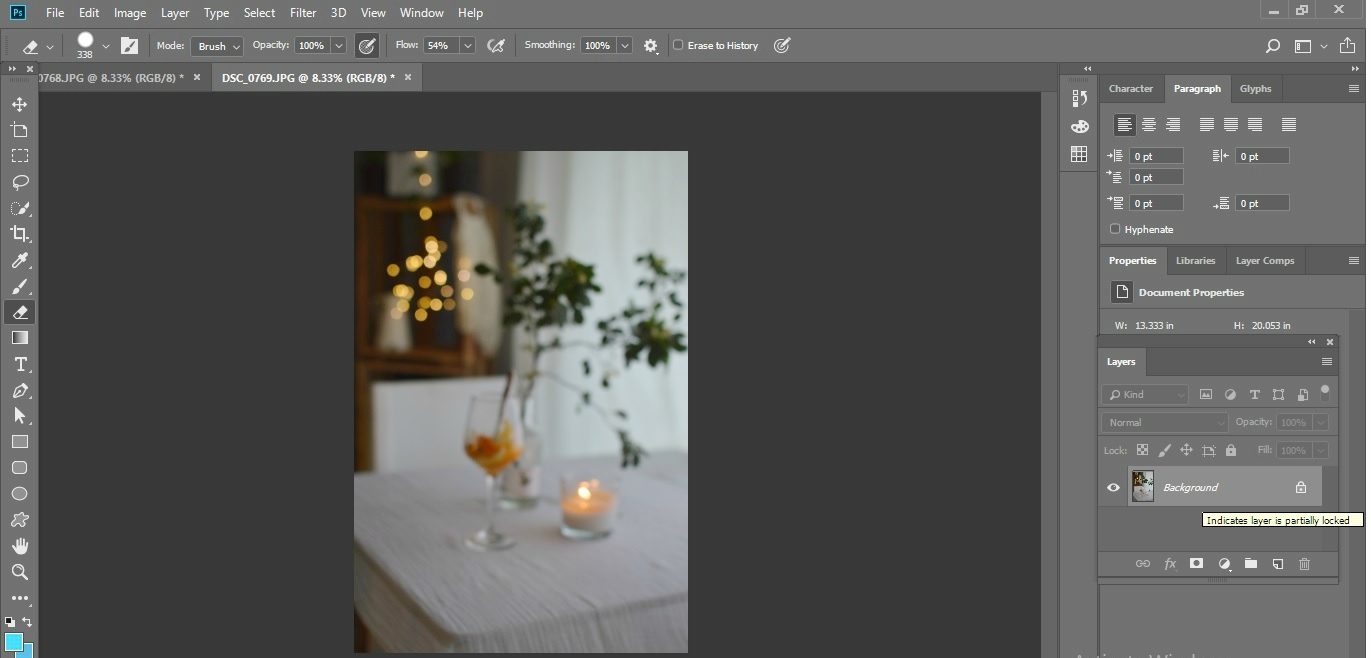
Next, choose the marquee tool, select the image you want to superimpose and press ctrl + C.
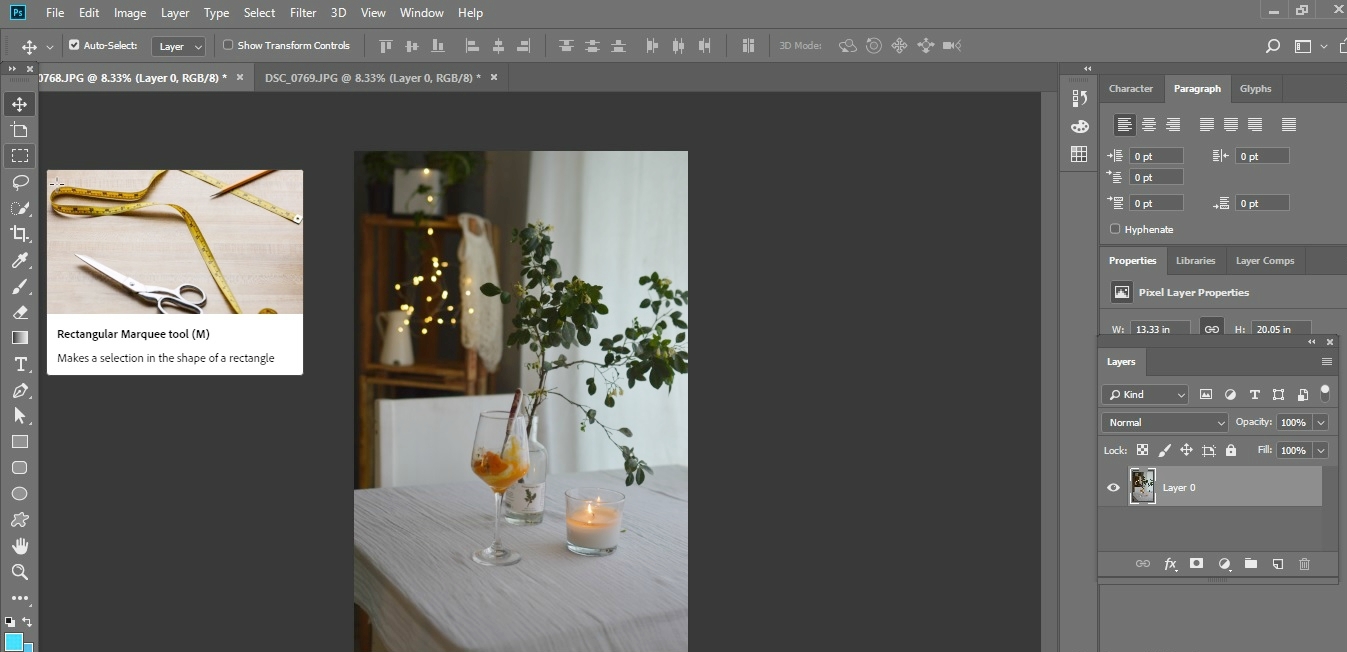
Next, go to the image on which you want to superimpose and ctrl + V. Now you have 2 layers.

Next, you’d want the eraser tool to erase layers and finally blend in the whole image.
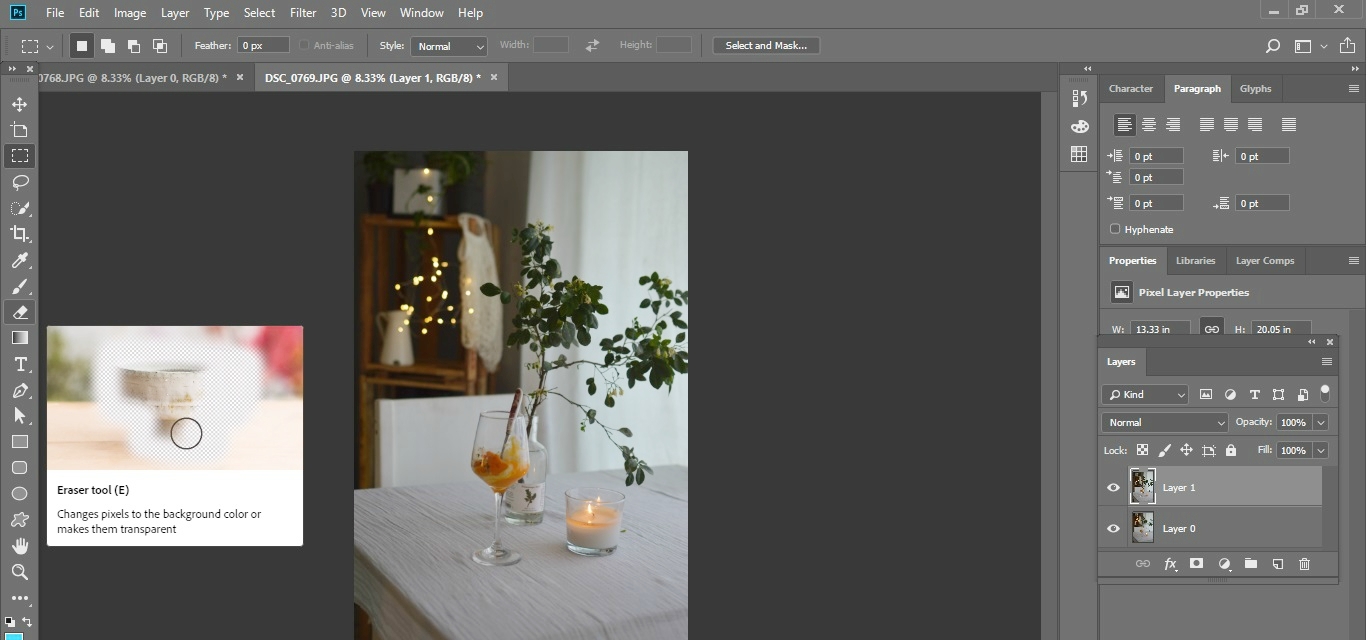
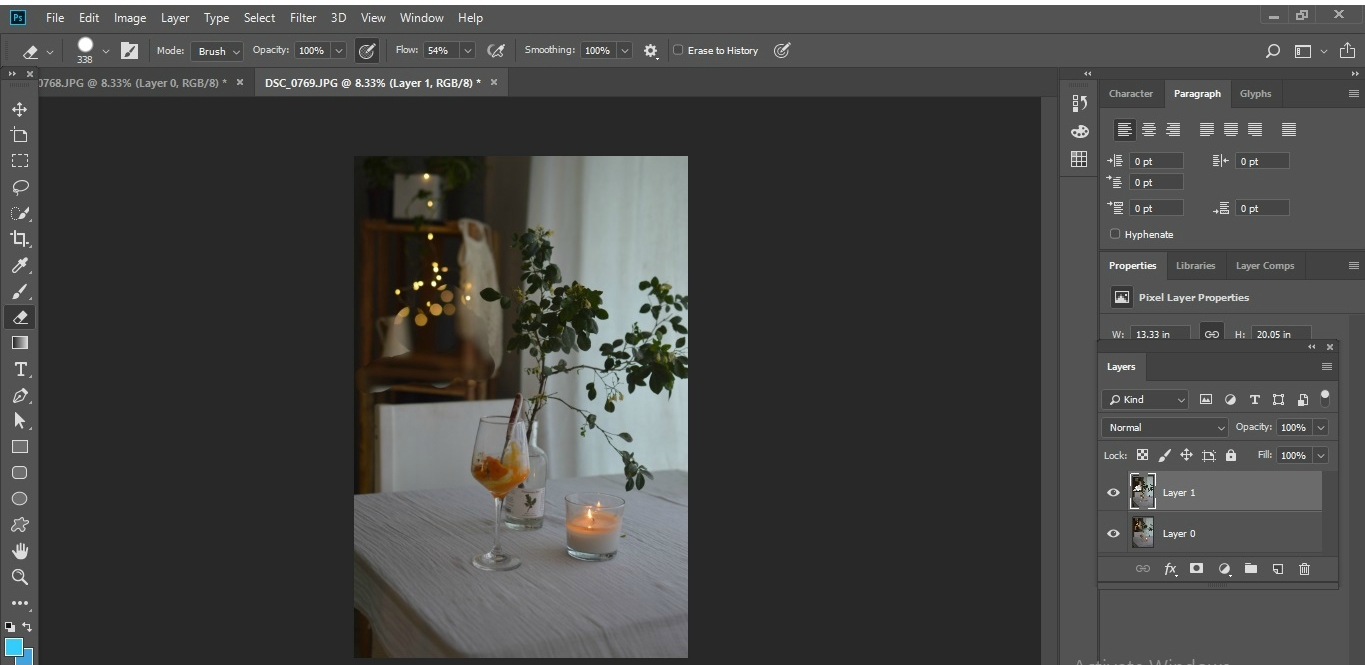
So I tried erasing layer 1 first but due to the slight difference in scale it was looking odd. So I dragged layer 0 (the blurred image) on top of layer 1 (the shapr image) and cleared layer 0 instead keeping the blur behind
Once you have blended the images, you should have something like this. At this stage you will have some rough edges which you can sort in photoshop itself but I find Ipiccy to be super handy.
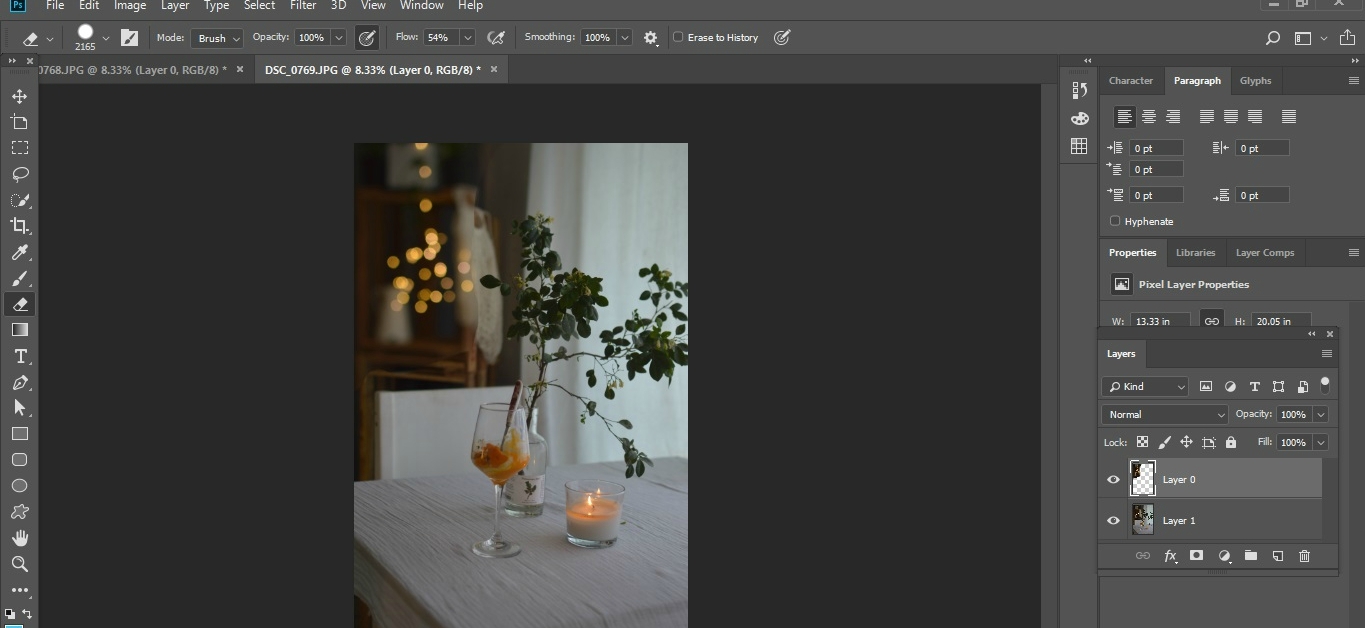
Merge layers and save as jpg. (Press control command key, choose both layers, right click and merge)
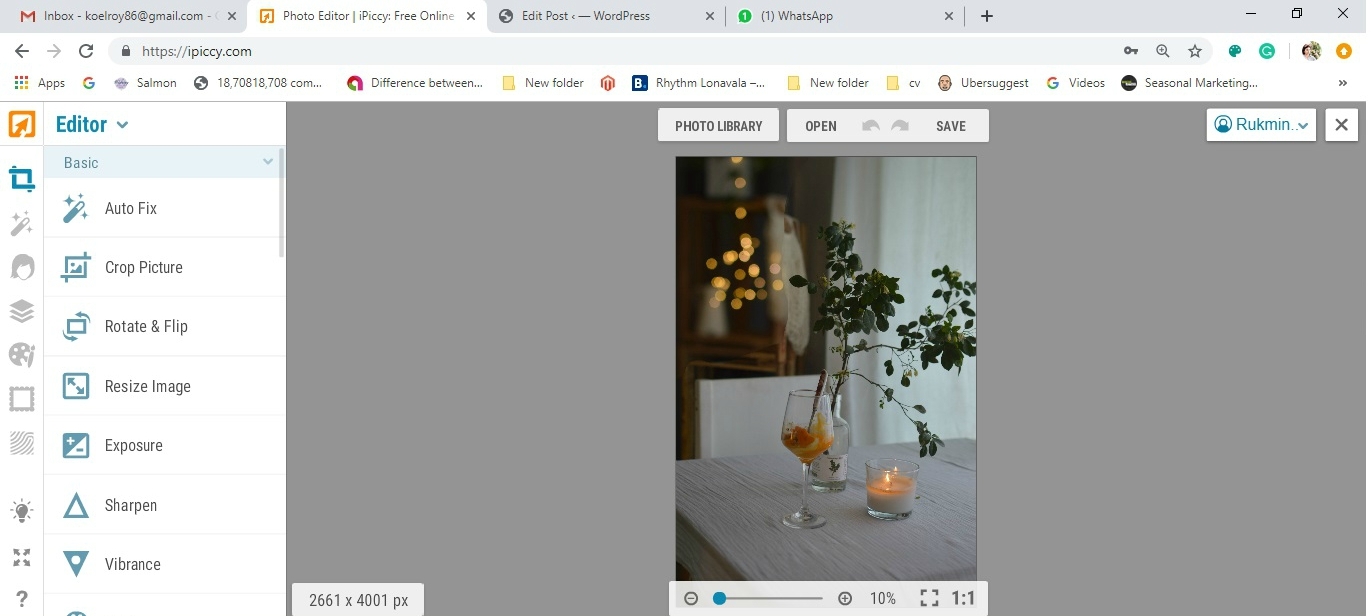
Now it’s time for the coolest and easiest tool in the world- iPiccy! haha, I have been ipiccy-ing for years now and I find it so super handy! I really am a thorough ipiccy enthusiast.
So once you have opened the image in iPiccy, choose Retouch command from the right. I will be using a mix of wrinkle remover and airbrush.
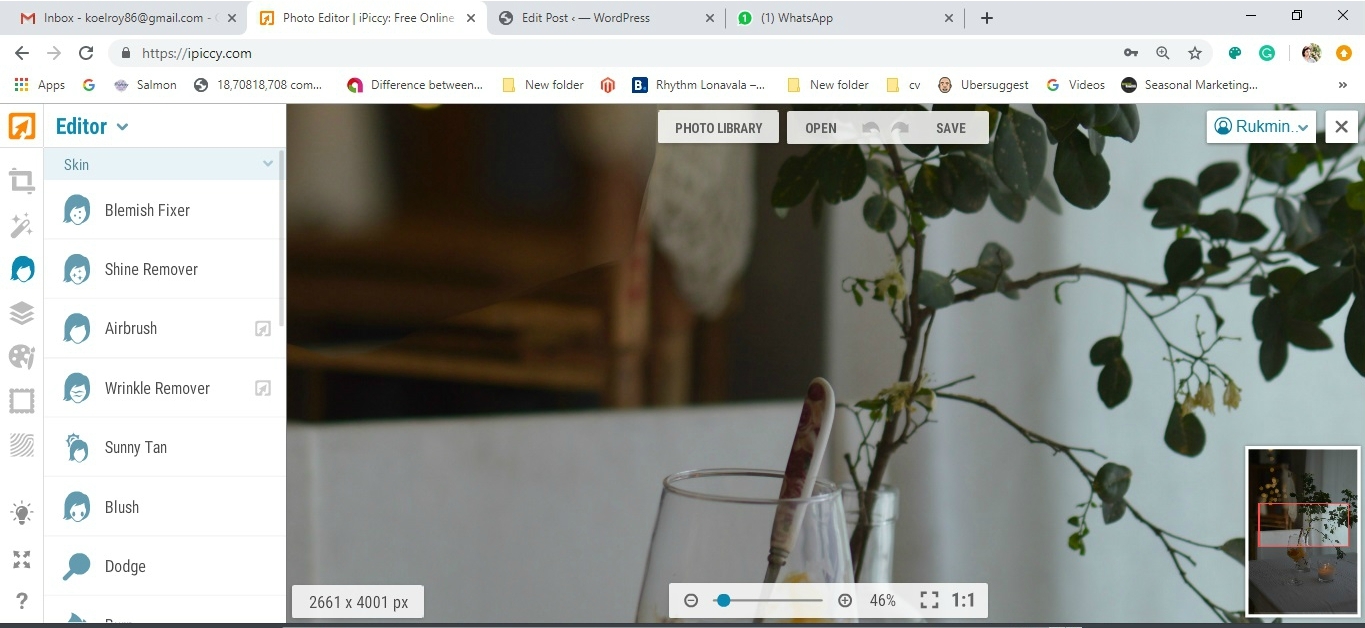
Enlarge the image and choose Wrinkle Remover. Now brush along the lines where you can see the focus difference. Be careful to not brush over areas that you have chose to be in focus. But the best part is, ieven if you do you, you can always undo it with an eraser brush.
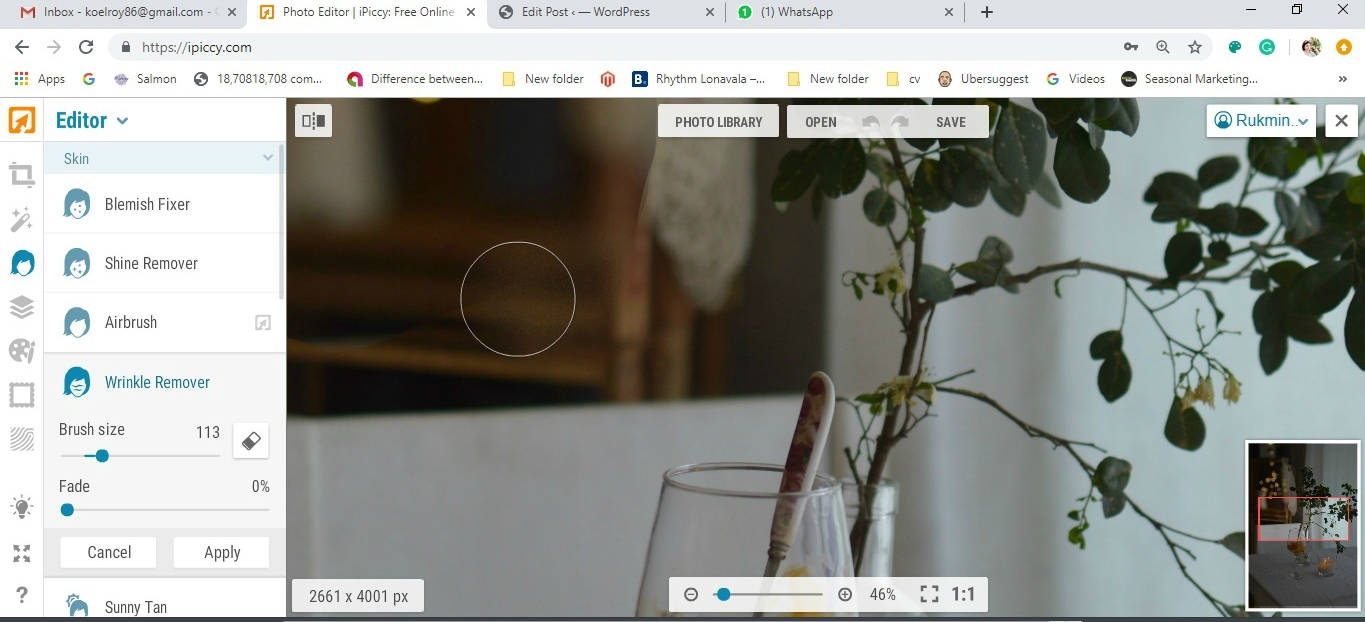
Now click on airbrush and brush over the areas you have blurred with wrinkle remover. This will give you an even blur without any grains.
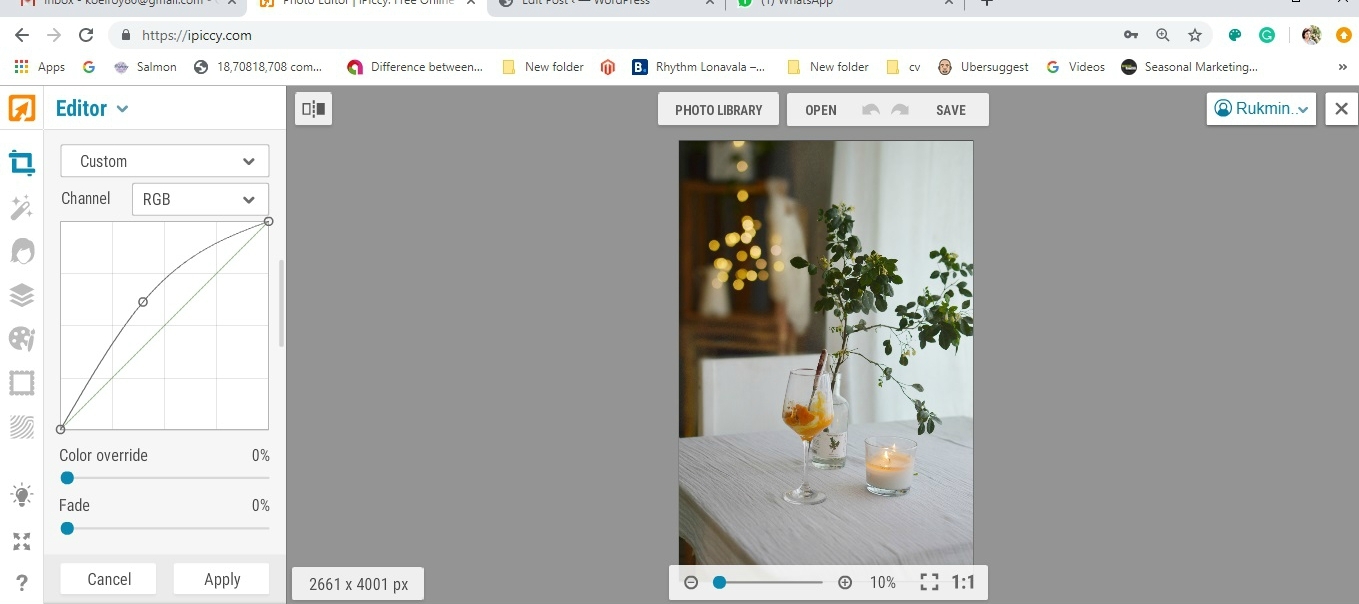
Once you are done with the image, and satisfied, go to “Basic” and slightly increase the light curve. Next, save in your computer and you are good to go!
Here’s our final image!

Here’s another image that we used focus stacking in!

Easy peasy right?
If you do try this tutorial out give me a holler! I would love to see your photos!
Here’s me, out and out from a bright Monday morning here in Mumbai. You have a super productive day ahead.


