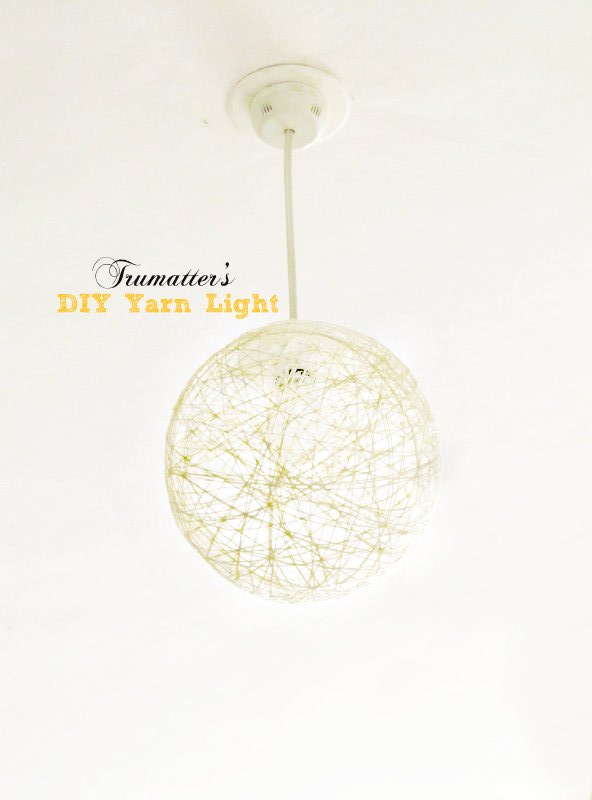
 Evening people! How have you all been and what have you upto? I have a really cool DIY to show you (read: How to make a yarn pendant light) and I know you’re gonna love this. This might also be the 1 millionth time you are seeing this online- so I cant blame you if its all too boring. Feel free to write in the comments section that I should do something different 😛 But honestly! I’ve been eyeing this DIY for ages now and I had to do this. It’s cool- this stuff.
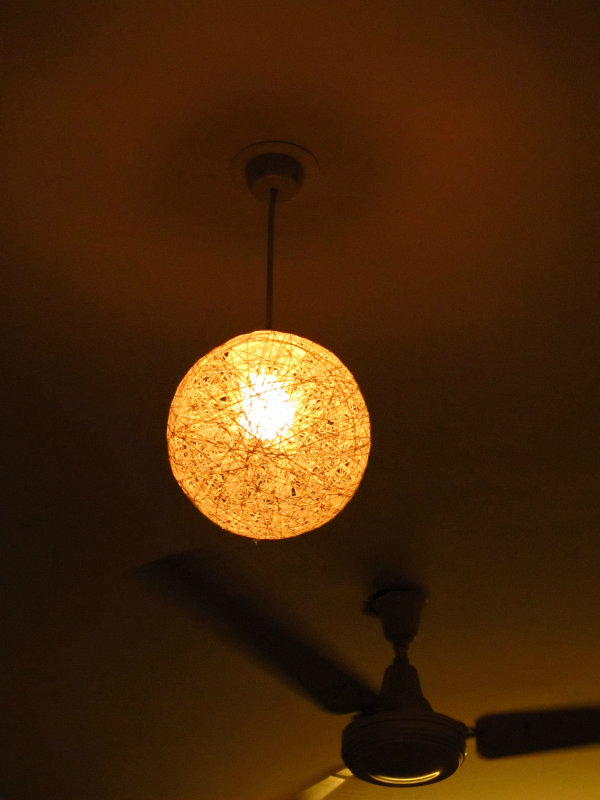
You know, I have a thing for lighting. I really do. And it’s not a recent, after-reading-pinterest development. It’s been there forever now. I love out of run lights that you don’t get to see everywhere. Fun ones, quirky ones, serene ones, beachy ones- I love it all. I also have a thing for warm yellow lights as opposed to incandescent lights and recessed lighting as opposed to direct overhead. Lol, and I make it very clear that its like that in ‘my’ home. You are not allowed to switch on a ‘tubelight’ when I am in the room. It pisses me off.
 You know, I am also intrigued to share this incident with you all. This is before this light came into being.
The story of the basket light
So my hall has 2 fans and there is a point for light in between the two. Our center-table rests somewhere strategically below the where the light hangs now and I thought a wicker basket light would look really nice. I got out my old rattan baskets and asked an electrician over so he could fix the light.
All this while the husband sits in his corner fiddling with his PC doing something. He turns back and tells me: “Koel, no! That thing is NOT going there as a light.” I get terribly pissed off and give it back: ‘Listen, you have no aesthetic sense. let me atleast try it out.’ He goes, “Im telling you that only looks good if you are putting it directly above a diner or a pool table”. I go, “Huff”
He turns back and gets into his business and I swear I could have pulled it off without him even looking at it. And I was sure he would have liked the end result had it not been for this ultra-oversmart electrician.
This guy walks in, sees everything (plug, blah blah) and then utters: “But mam, will it look good there? Its just a basket”
The boy hears it and turns around and tells me “Koel, that basket- I told you not to. It will look horrible. Throw it away right now”.
God damn electrician. Do what you are being paid for you idiot. I was so angry on that poor bloke- I literally misbehaved with him for spoiling my plans and told him to eff off.
The boy comes around and tells me, “If you must put a light there, think of something beautiful. You can make it”
That’s where it all began…
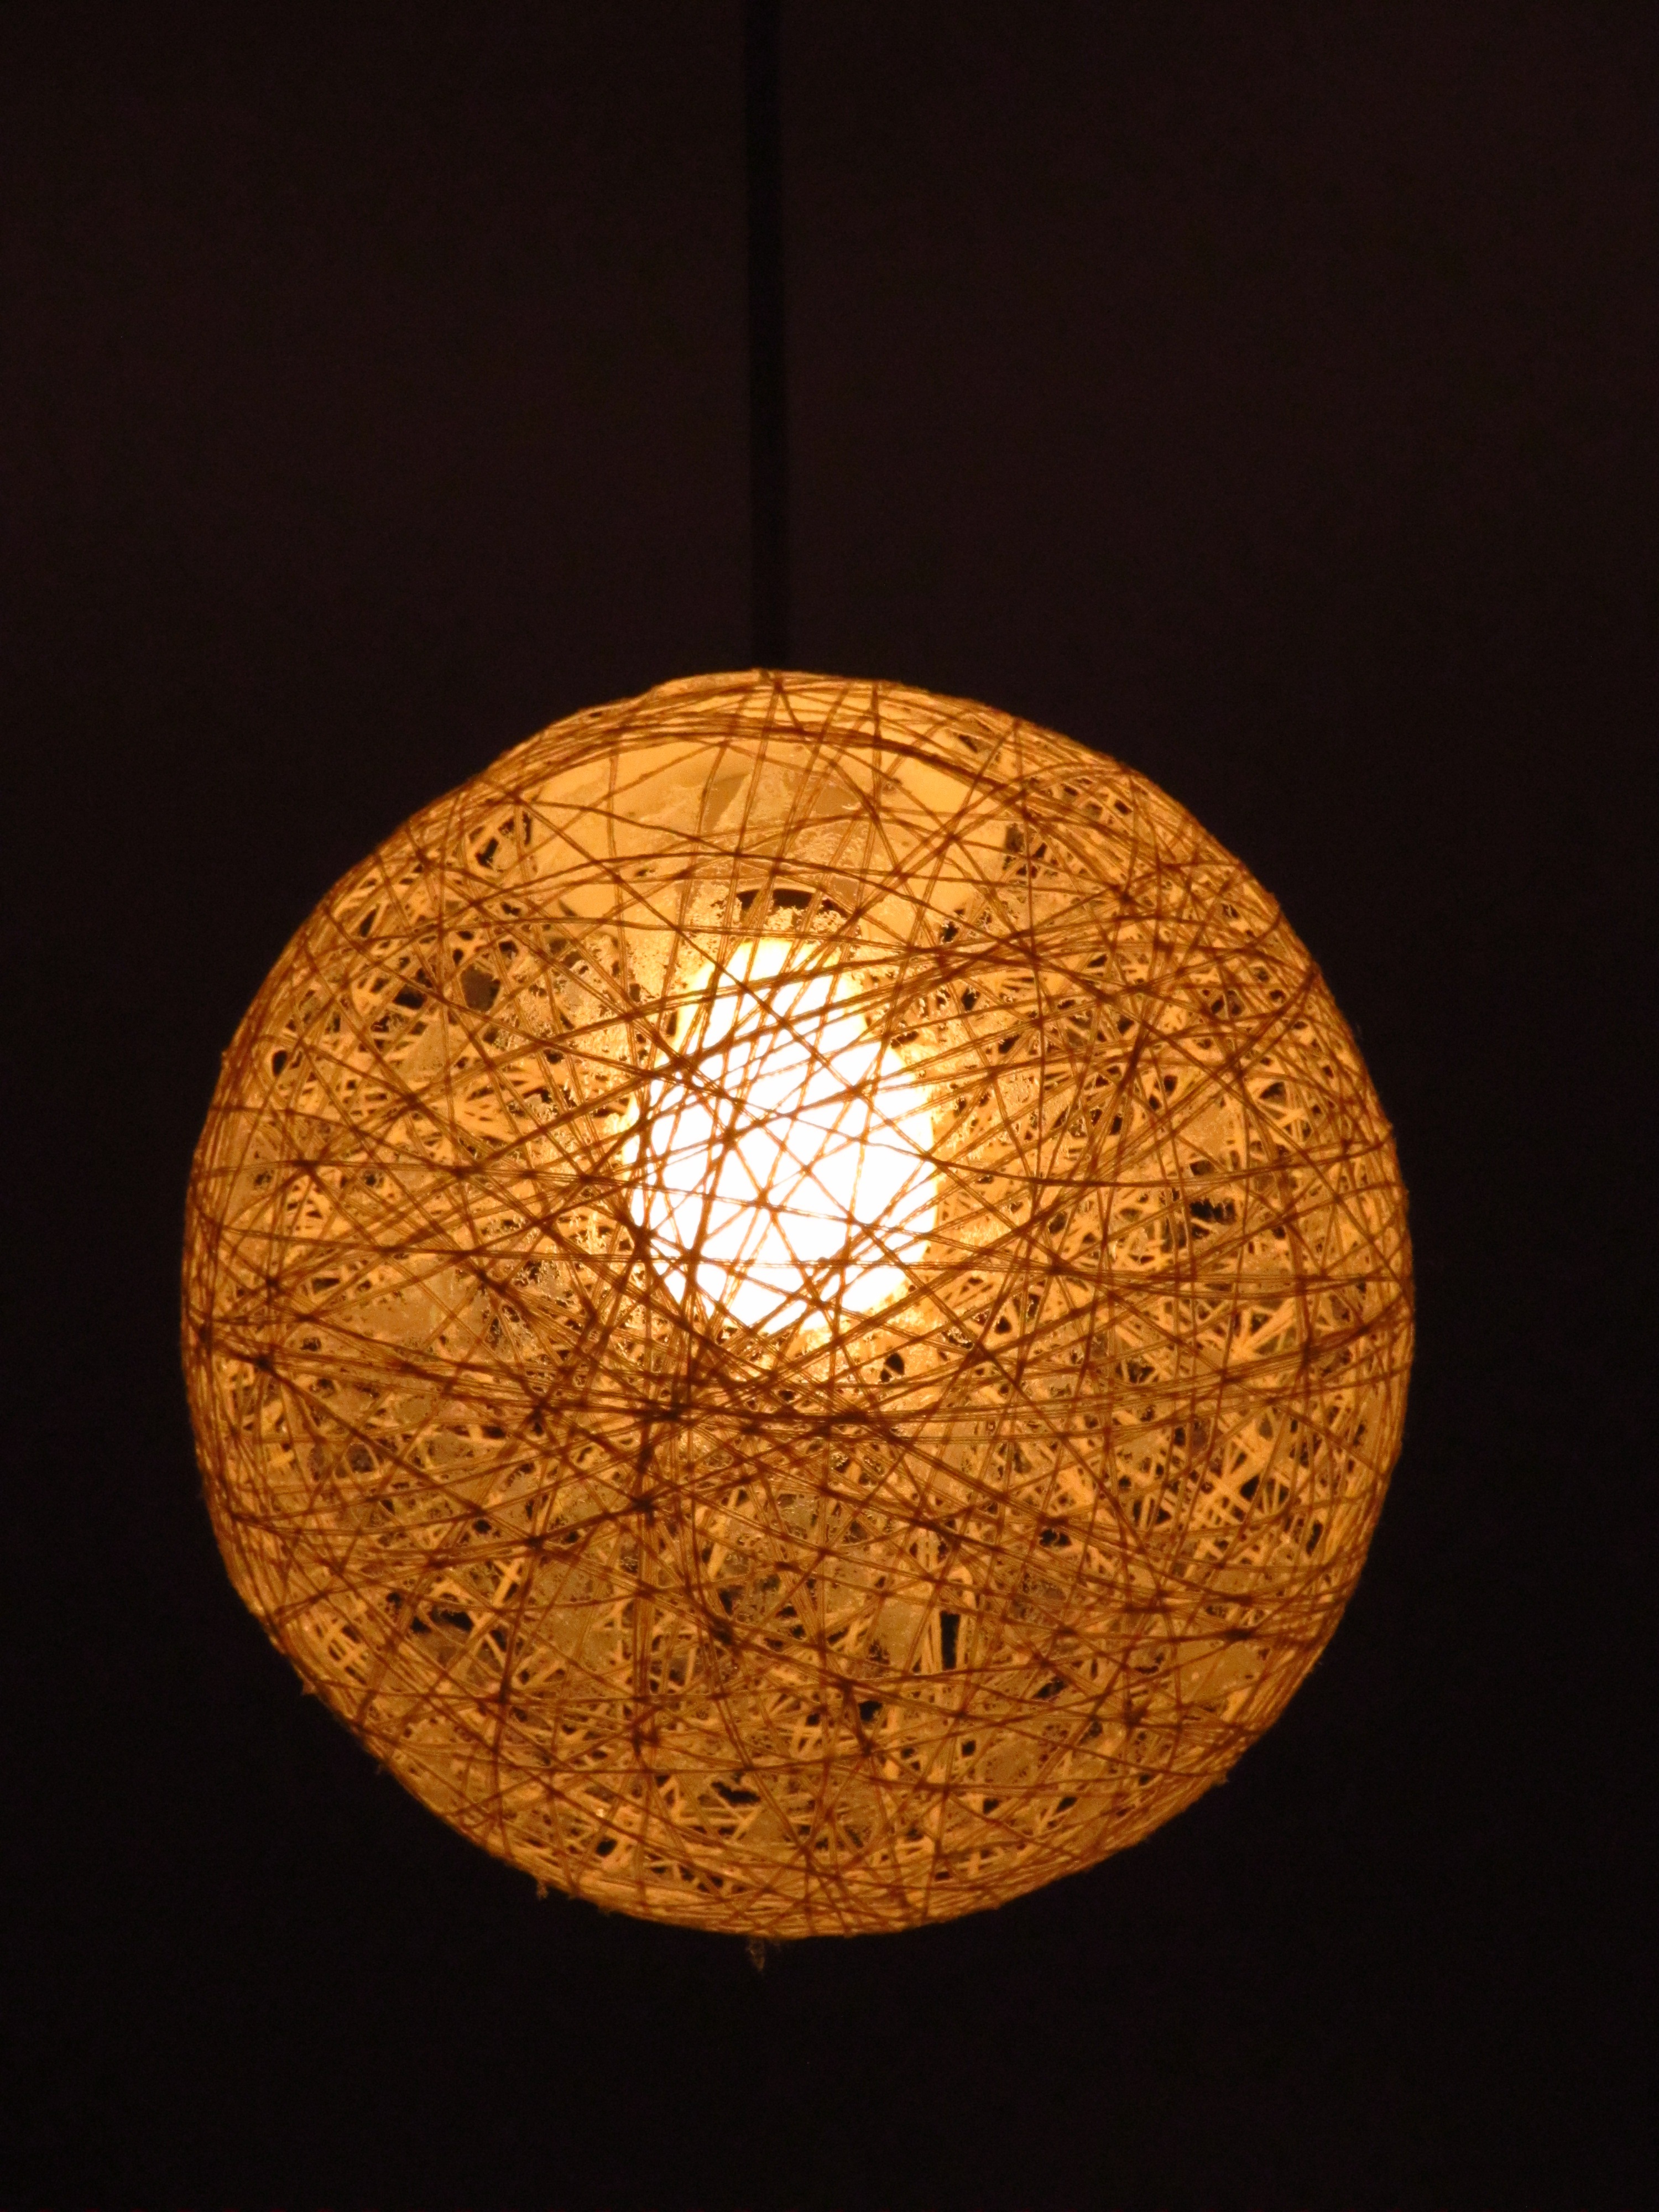 Honestly, I’m glad I didn’t put that basket light. Both were right. It would have looked fuckall. {sorry} This looks so much better. And it’s very easy to make and assemble too.
Here’s how I did it..
Part 1: What you’ll need for your Yarn Light
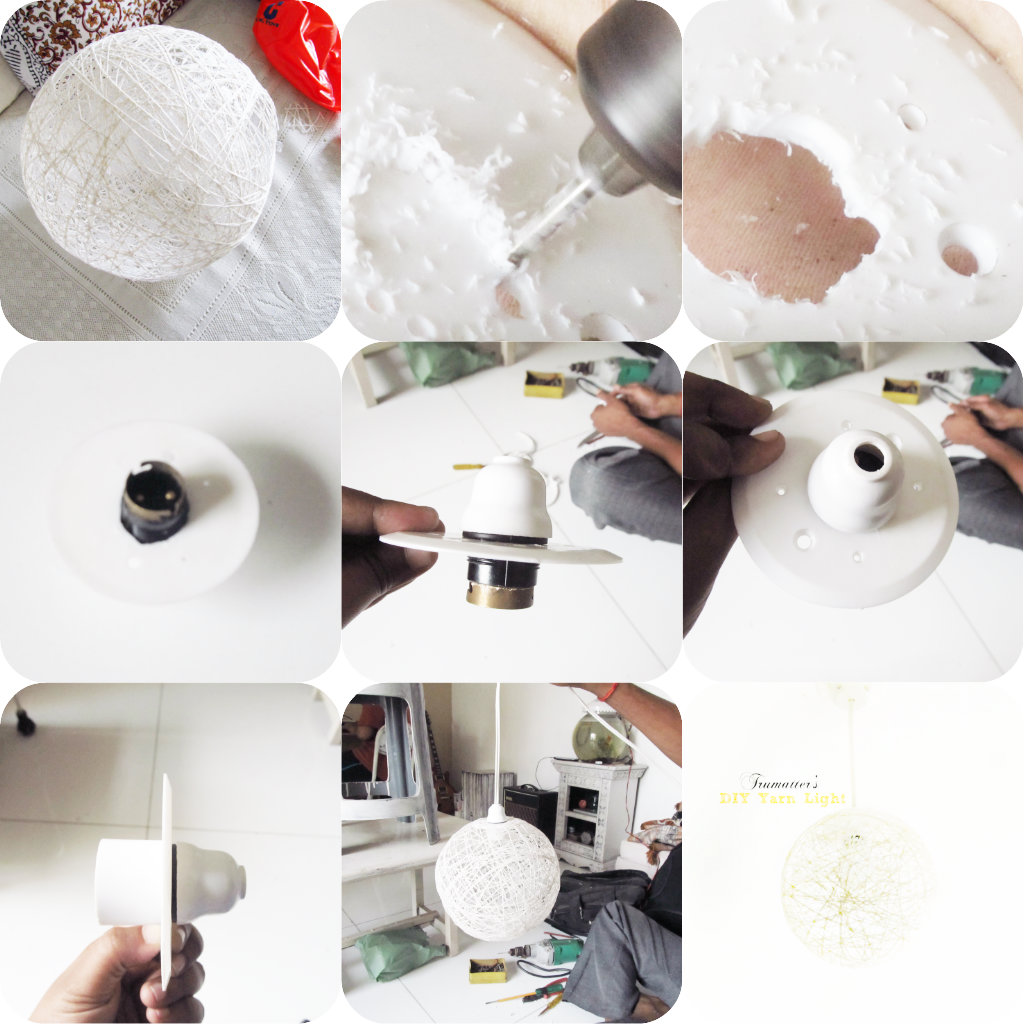
You’ll need a beach ball, vaseline and white glue that dries clear
You’ll need a ball of yarn, butchers thread, rattan- like whatever
Patience.
A large polythene
Part 2: How to make DIY Yarn Light
Rub the beach ball with generous amount of vaseline or any petroleum jelly- yeah, you’ll feel a little weird and porno-ish while doing this. Like you’re holding it somewhere near your stomach and rubbing petroleum jelly on it- yeah..tacky. I promise you, the next step is even better. From feeling like a beach babe trying to seduce some coast guard to outright psychotic.
Dowse a ball of yarn in glue. Keep wrapping the ball as much as you can. Don’t let anyone see you doing this part.
Keep it for 24 hours to dry.
Once completely dry, make a hole in the ball and see the magic. It will shrink leaving the cast behind. {{Tears}}
With a tweezer, take the ball out. You can also cut it in smaller pieces with a scissor and take them out. You’ll figure this part out.
Cut a small circle on top of the cast with your scissor. Don’t cut it very big or you won’t be able to stick your ceiling plate.
This ends your part 2.
PART 3: How to assemble your Yarn Light
You’ll need a porcelain/plastic bulb holder
A ceiling plate
A frosted bulb
Wire {you decide the length}
A drill machine
A tall guy
How
Measure your bulb holder and drill a circle in the ceiling plate.
Your bulb holder will have 3 distinct parts: 1- main part with the brass attachment 2- the cover on top 3- a ring that fits over the brass attachment
You will put the main holder through the hole in the ceiling plate and attach the ring (this has threads) to secure.
Next, attach wire and secure the top part. At this point, check if its working.
Fit a bulb of your choice, carefully apply glue on the rim of your ceiling plate and slide it {sideways} inside the cast through the cut on top.
Straighten it {at this point the free ends of the cast should rest on the rim of the plate. Hence- cut the top accordingly}and attach the side of your cast to the plate.
This is where the tall guy comes in. Get him to attach it to the main wire on the ceiling and if you hate him- put the switch on while he is still working.
Hahaha- yeah, im an evil monster.
Once fixed, marvel at what you’ve created and what all you’ve gone through. A glass of wine comes handy.
Be enlightened!
Sharing at
Monday
http://homecomingmn.blogspot.in/2013/10/diyers-32-and-marathon-weekend.html
http://diyshowoff.com/category/other/that-diy-party/.
http://www.the-chicken-chick.com/
Tuesday
My Uncommon Slice of Suburbia – Tuesday’s Treasures
Coastal Charm – Nifty Thrifty
Wednesday
http://www.savvysouthernstyle.net/2013/10/wow-us-wednesdays-139.html
Thursday
From My Front Porch To Yours – Treasure Hunt Thursday
lovely,very elegant
🙂 look who’s here!!! Thank you! you need to come and see this.
That’s amazing! I always wanted to do a yarn ball like that but never did.
I finally did it. So happy with the result. Btw, that balloon thing doesn’t work.
Oh yeah, that light is way cool! Glad you didn’t go with the uncool basket.
Let me paste that for the husband. He’ll be all proud and “see, I told you” 😉
Great tut!
In the 70’s we made quite a few similar to this, but we covered them with torn pieces of tissue paper.
Ah! The 70’s. Yeah, mum made one with tissue paper too!